Deploying AlertD to AWS
This guide walks you through deploying AlertD to your AWS account using CloudFormation. The deployment creates a fully managed, containerized application running on ECS Fargate with all supporting infrastructure.
Estimated time: 15-20 minutes
Step 0: Subscribe to AlertD on AWS Marketplace
AlertD is available on the AWS Marketplace. See Costs and Billing for a breakdown of AlertD’s licensing charges and the AWS-side and LLM-side costs your deployment will incur.
Prerequisites for Subscription
Design partners must first share their AWS account ID with the AlertD team so we can whitelist it. Once whitelisted, you can proceed with the subscription.
Subscribe to AlertD
- Visit the AWS Marketplace listing: AWS Marketplace - AlertD
- Click Continue to Subscribe
- Accept the terms and complete the subscription process
- This subscription ensures smooth integration with your AWS environment and enables support during the design phase
Once subscribed, proceed with the CloudFormation deployment below.
Step 1: Open CloudFormation Console
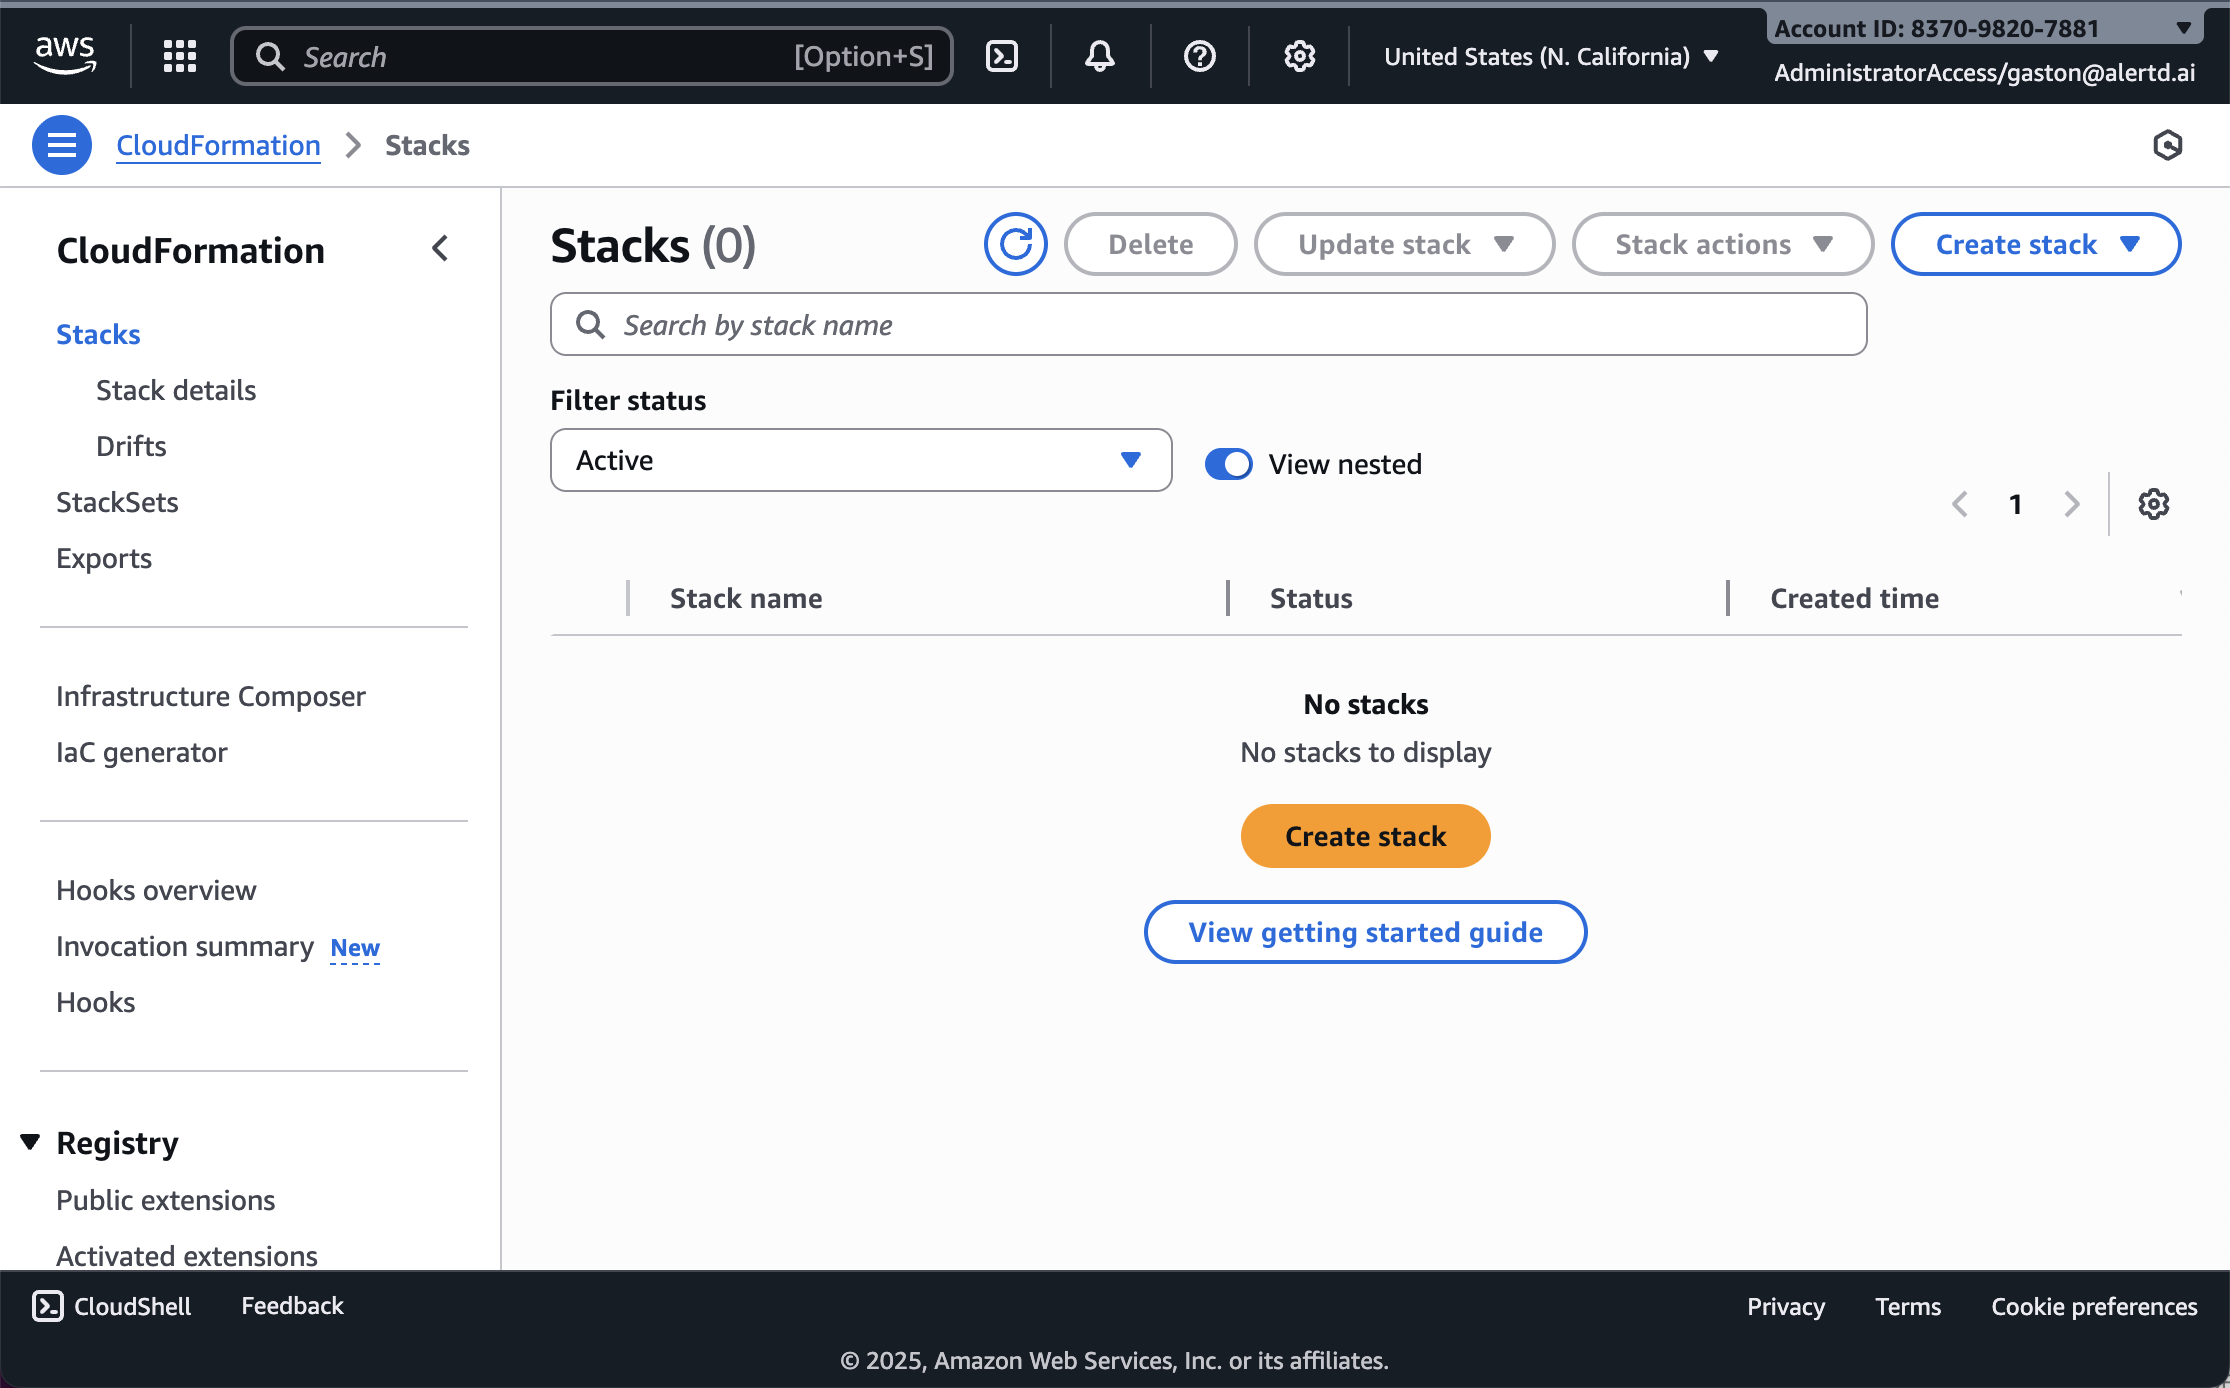
- Sign in to your AWS Management Console
- Navigate to CloudFormation → Stacks
- Ensure you’re in the correct AWS region where you want to deploy AlertD
- Verify the Stacks view is displayed
Step 2: Create a New Stack
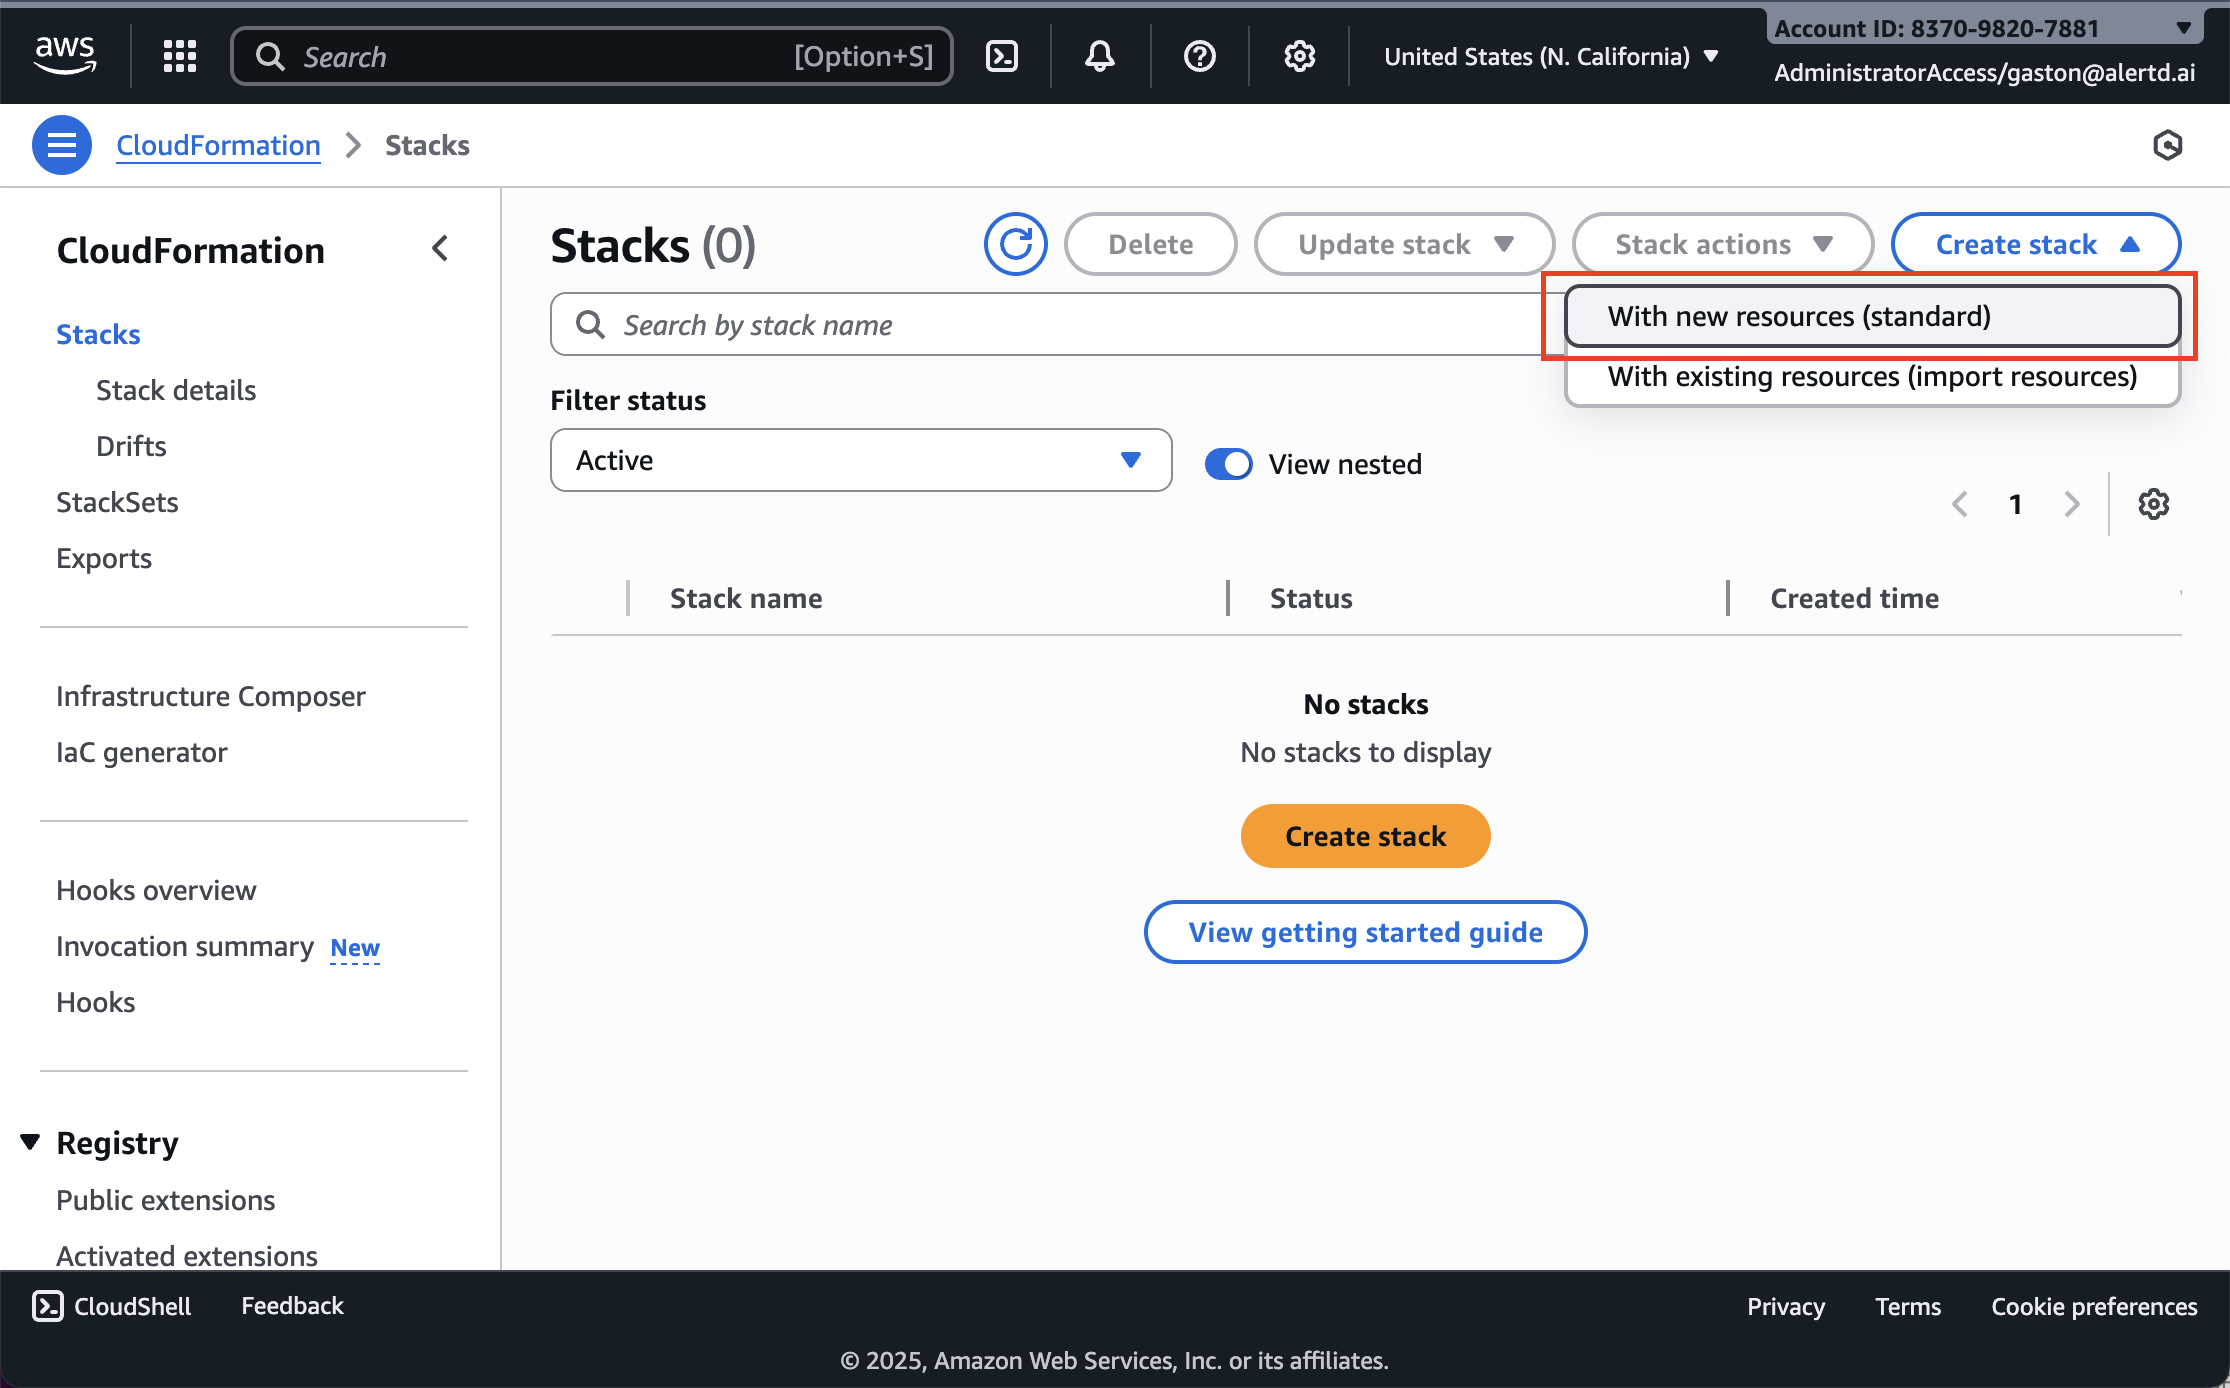
- Click Create stack
- In the dropdown, select With new resources (standard)
- This will initiate a new CloudFormation stack deployment
Step 3: Specify the AlertD Template
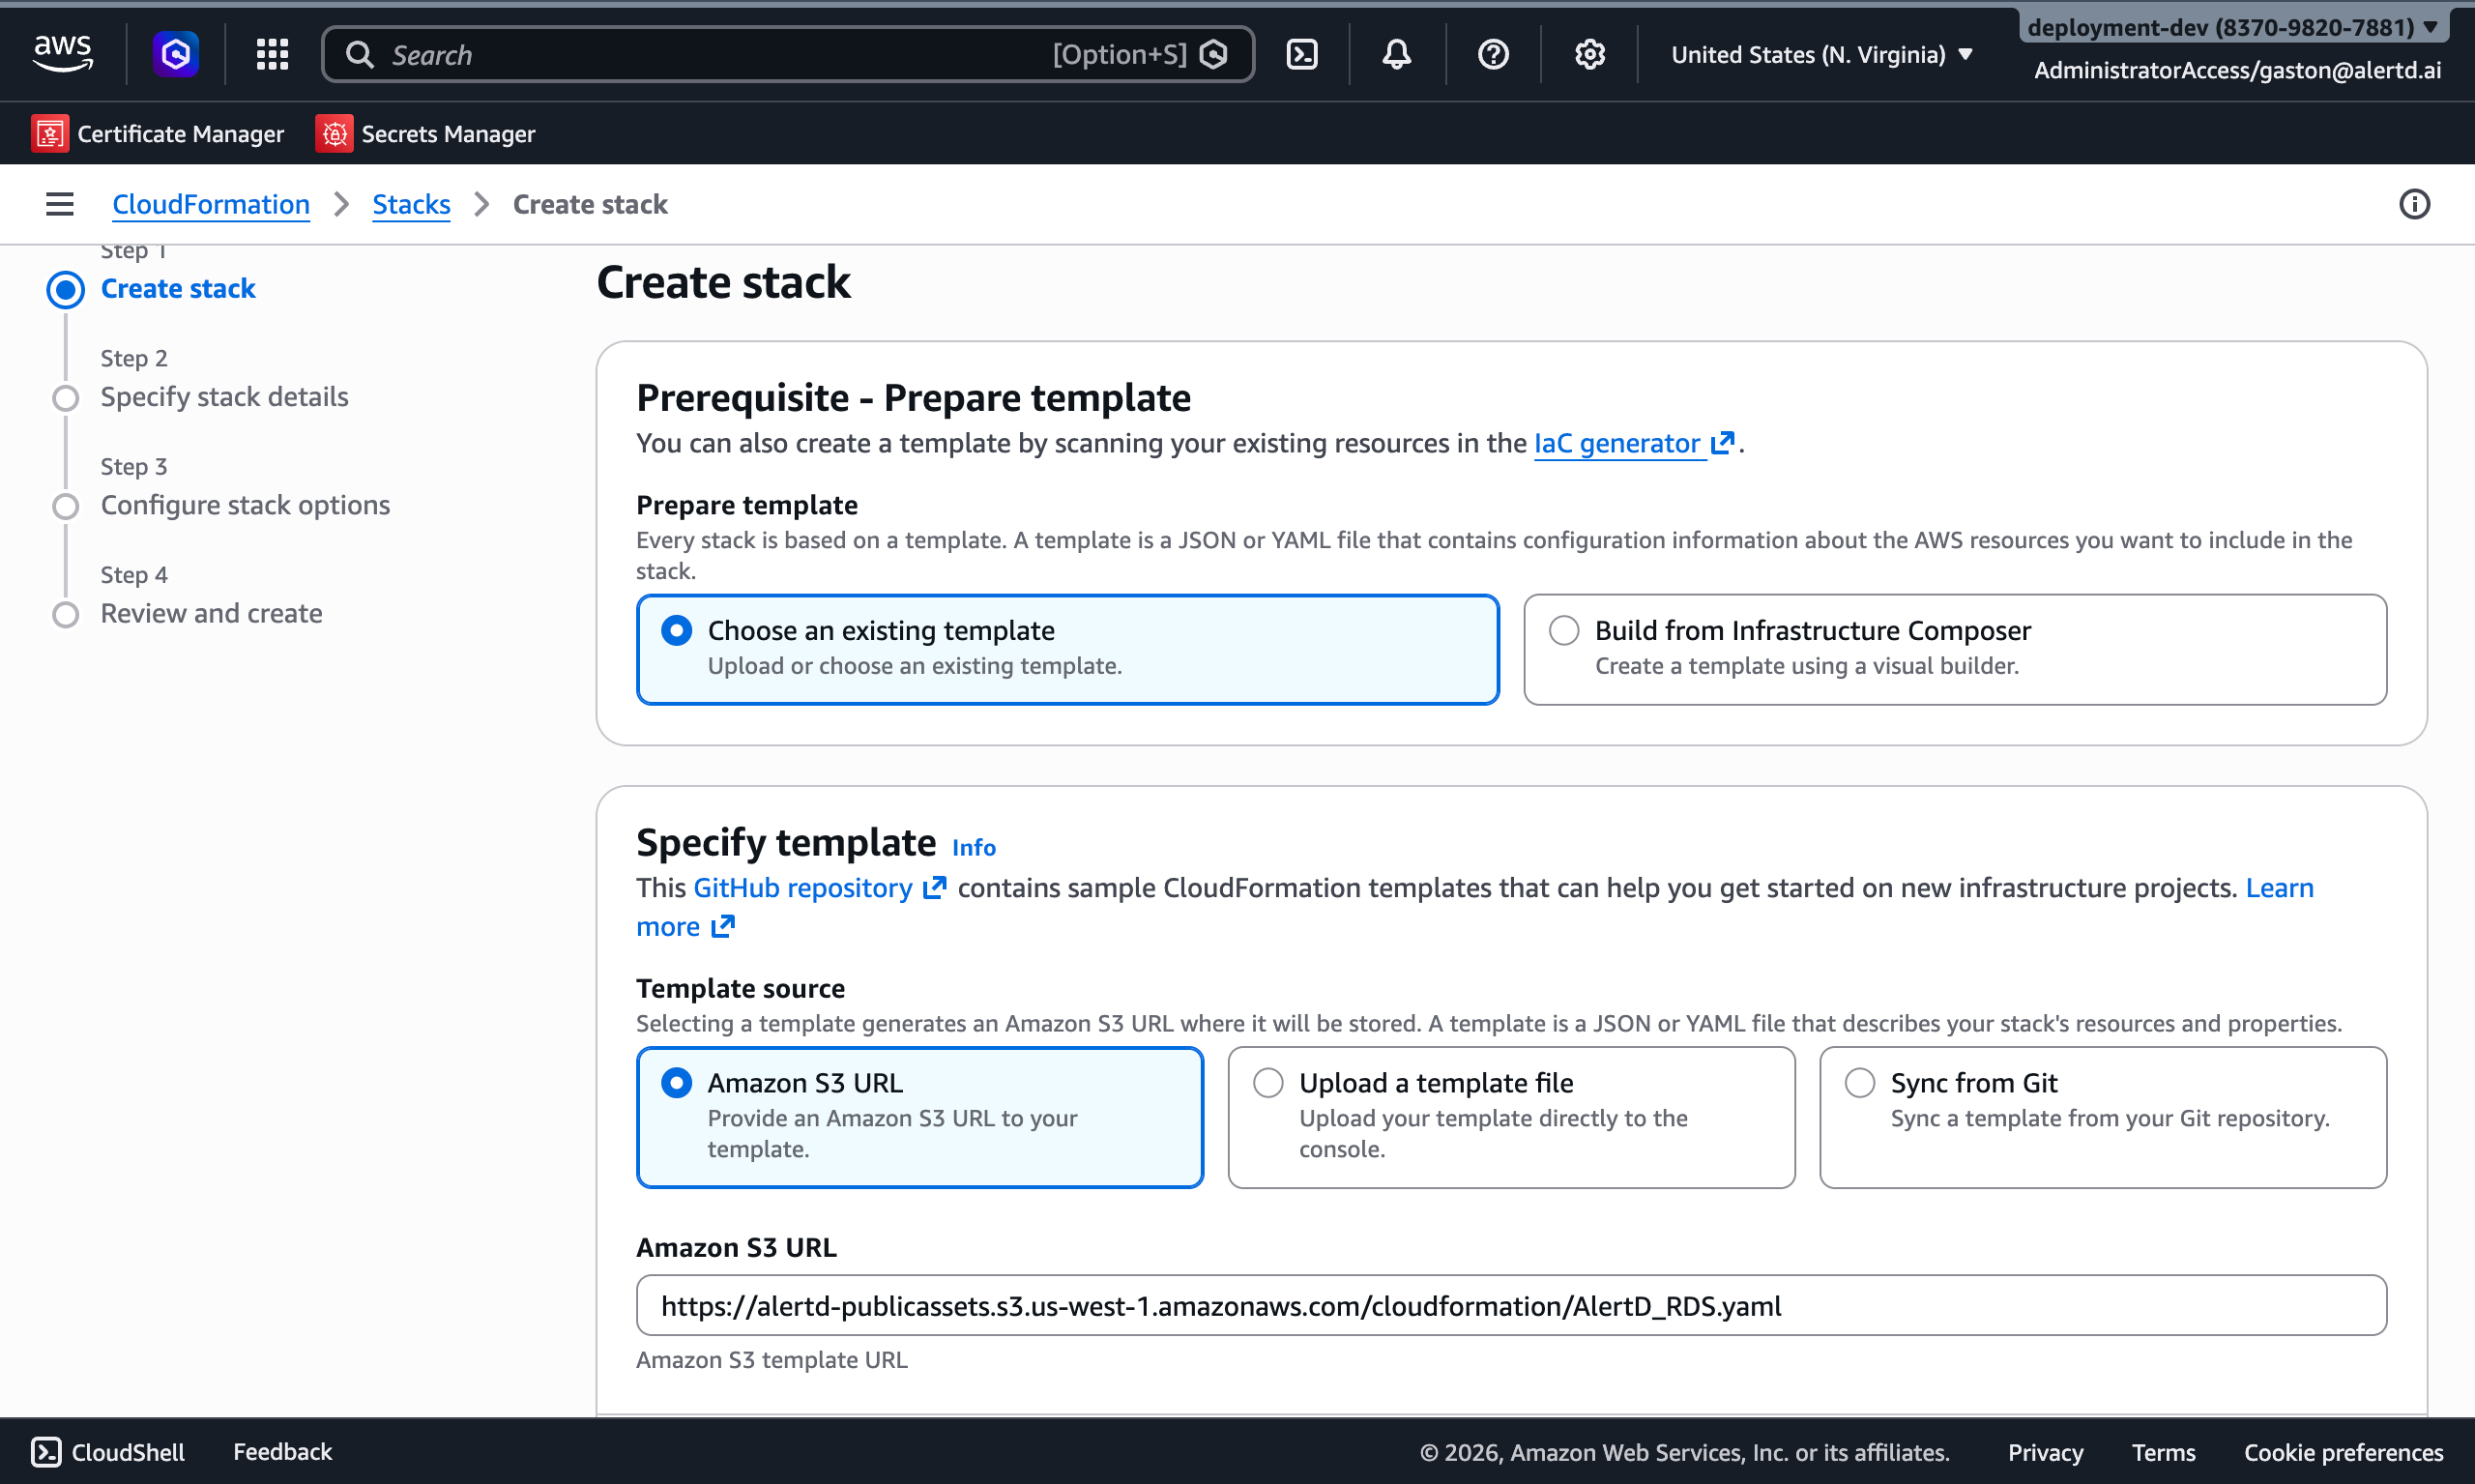
- Under Prerequisite – Prepare template, select Choose an existing template
- Under Specify template, select Amazon S3 URL
- Paste the following AlertD CloudFormation template URL:
https://alertd-publicassets.s3.us-west-1.amazonaws.com/cloudformation/AlertD_RDS.yaml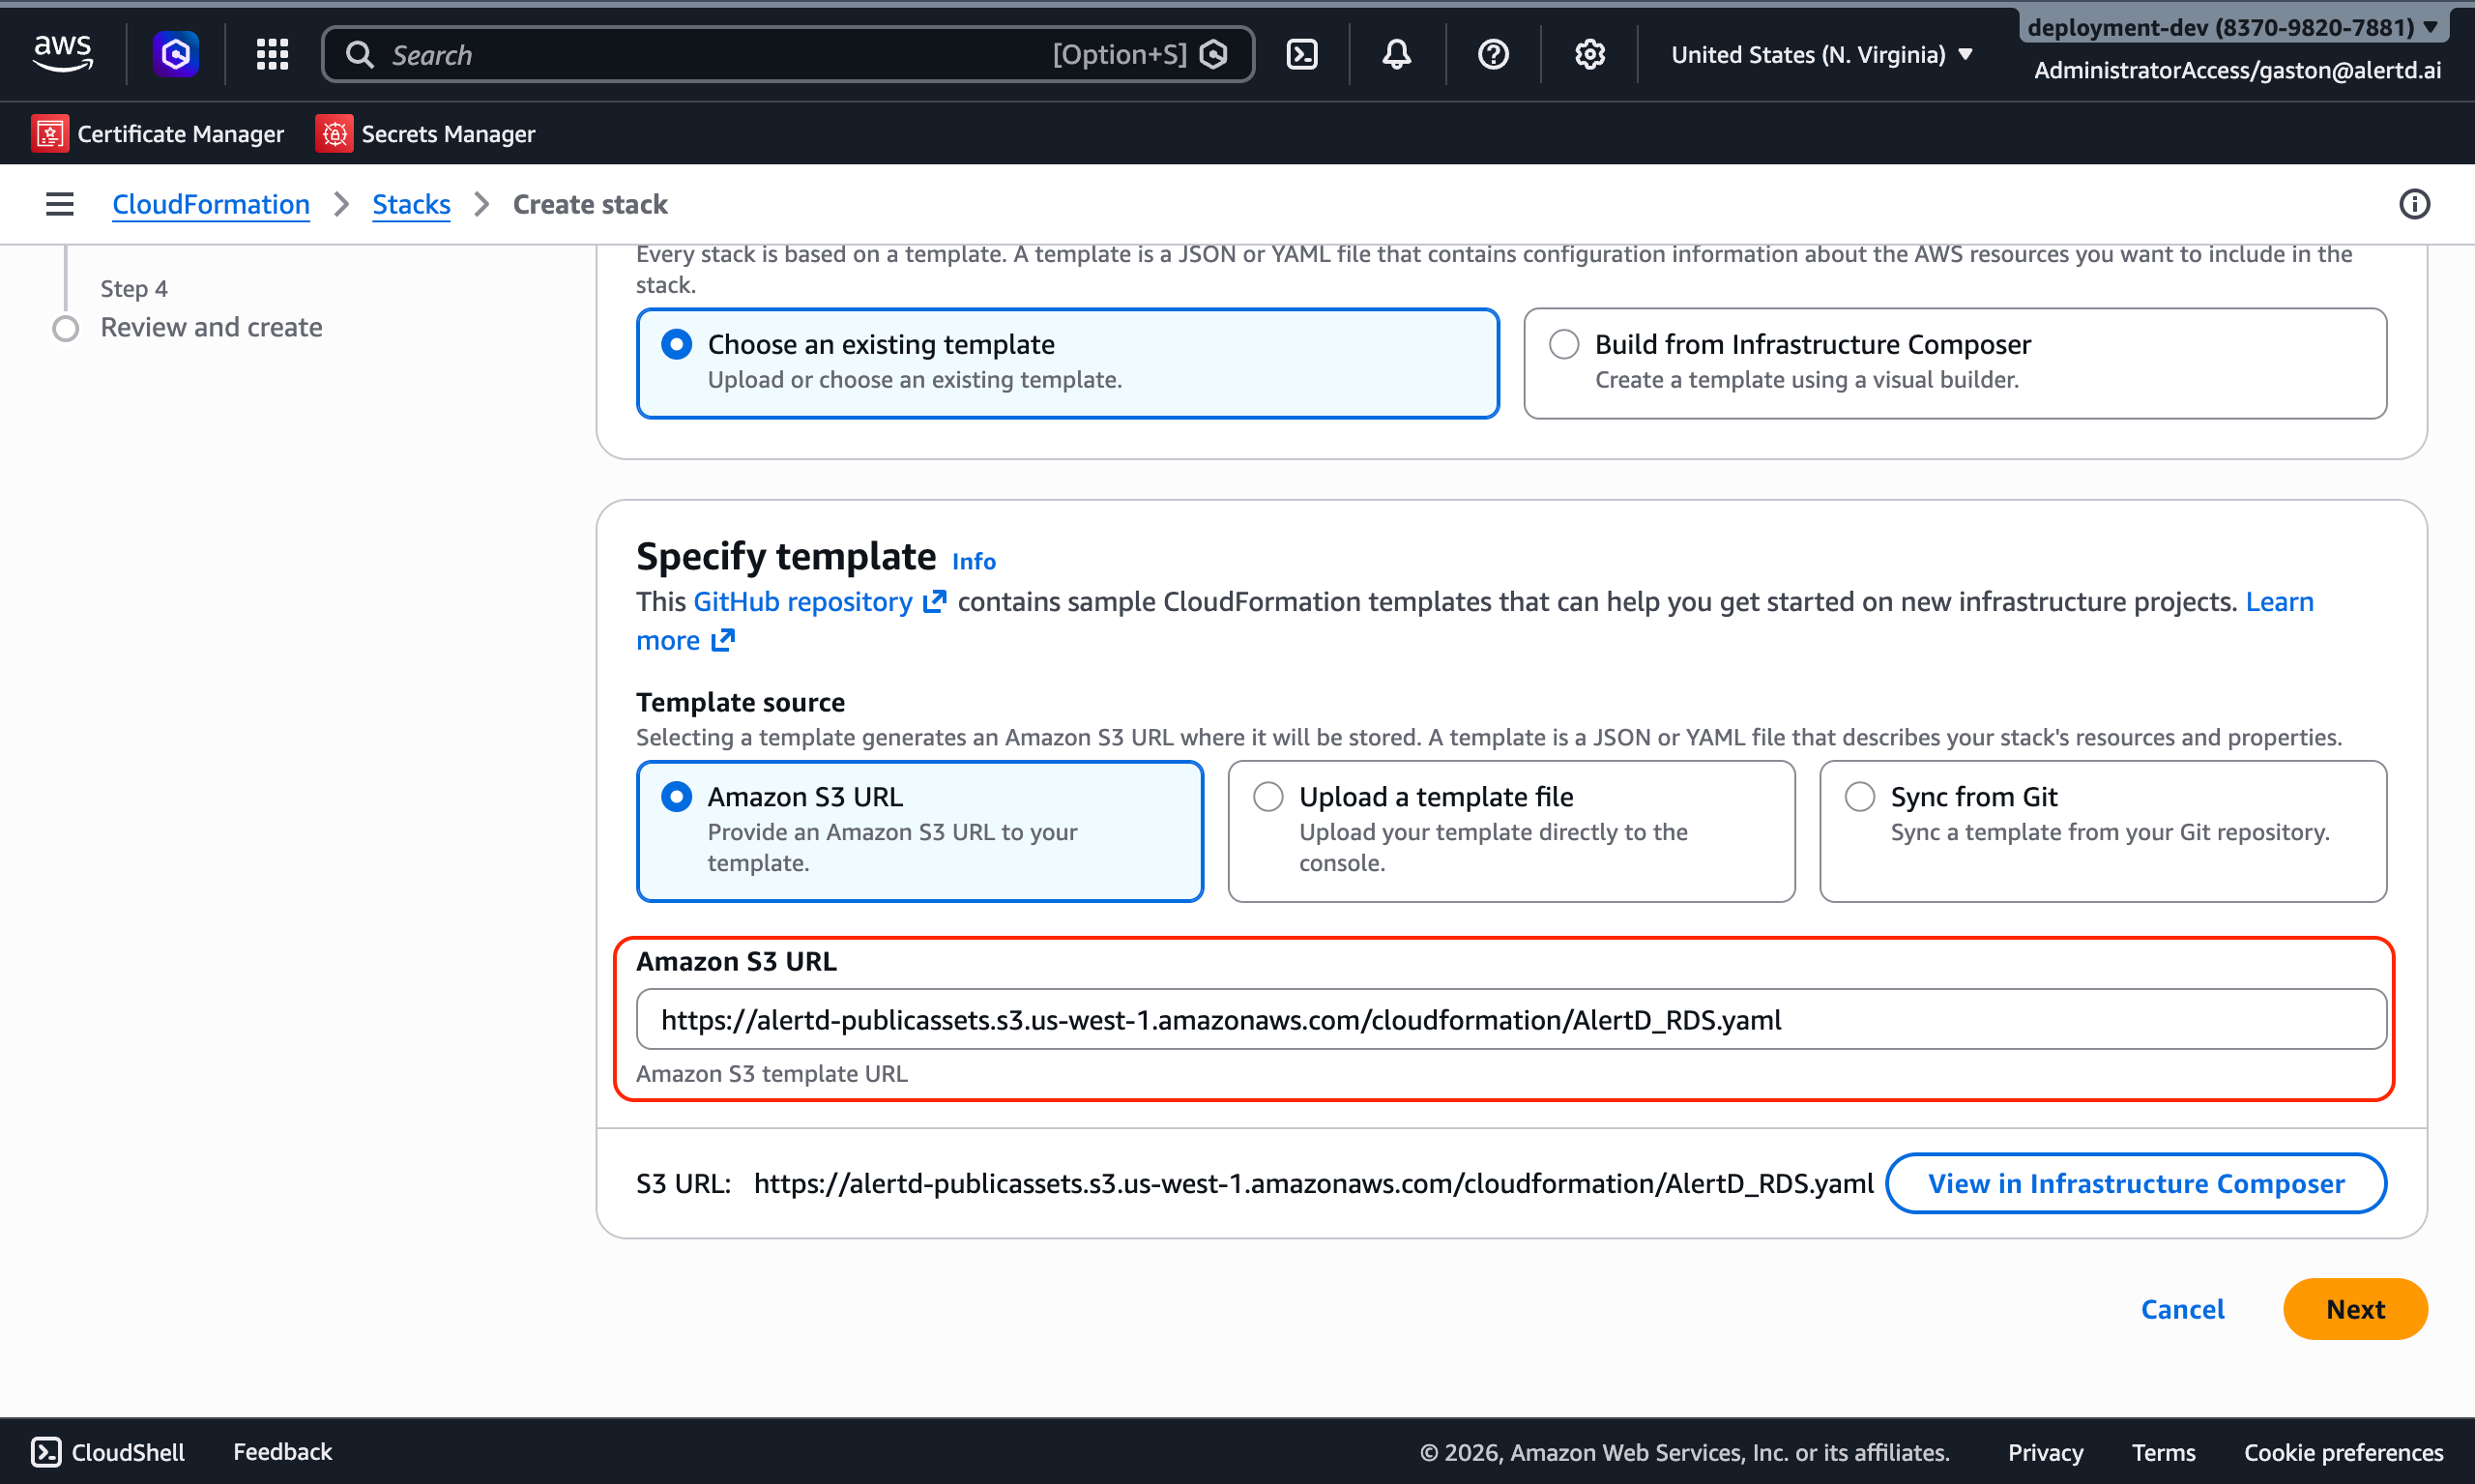
- Click Next to proceed to stack configuration
Step 4: Configure Stack Name and Certificate
Stack Name
Enter a descriptive stack name:
alertd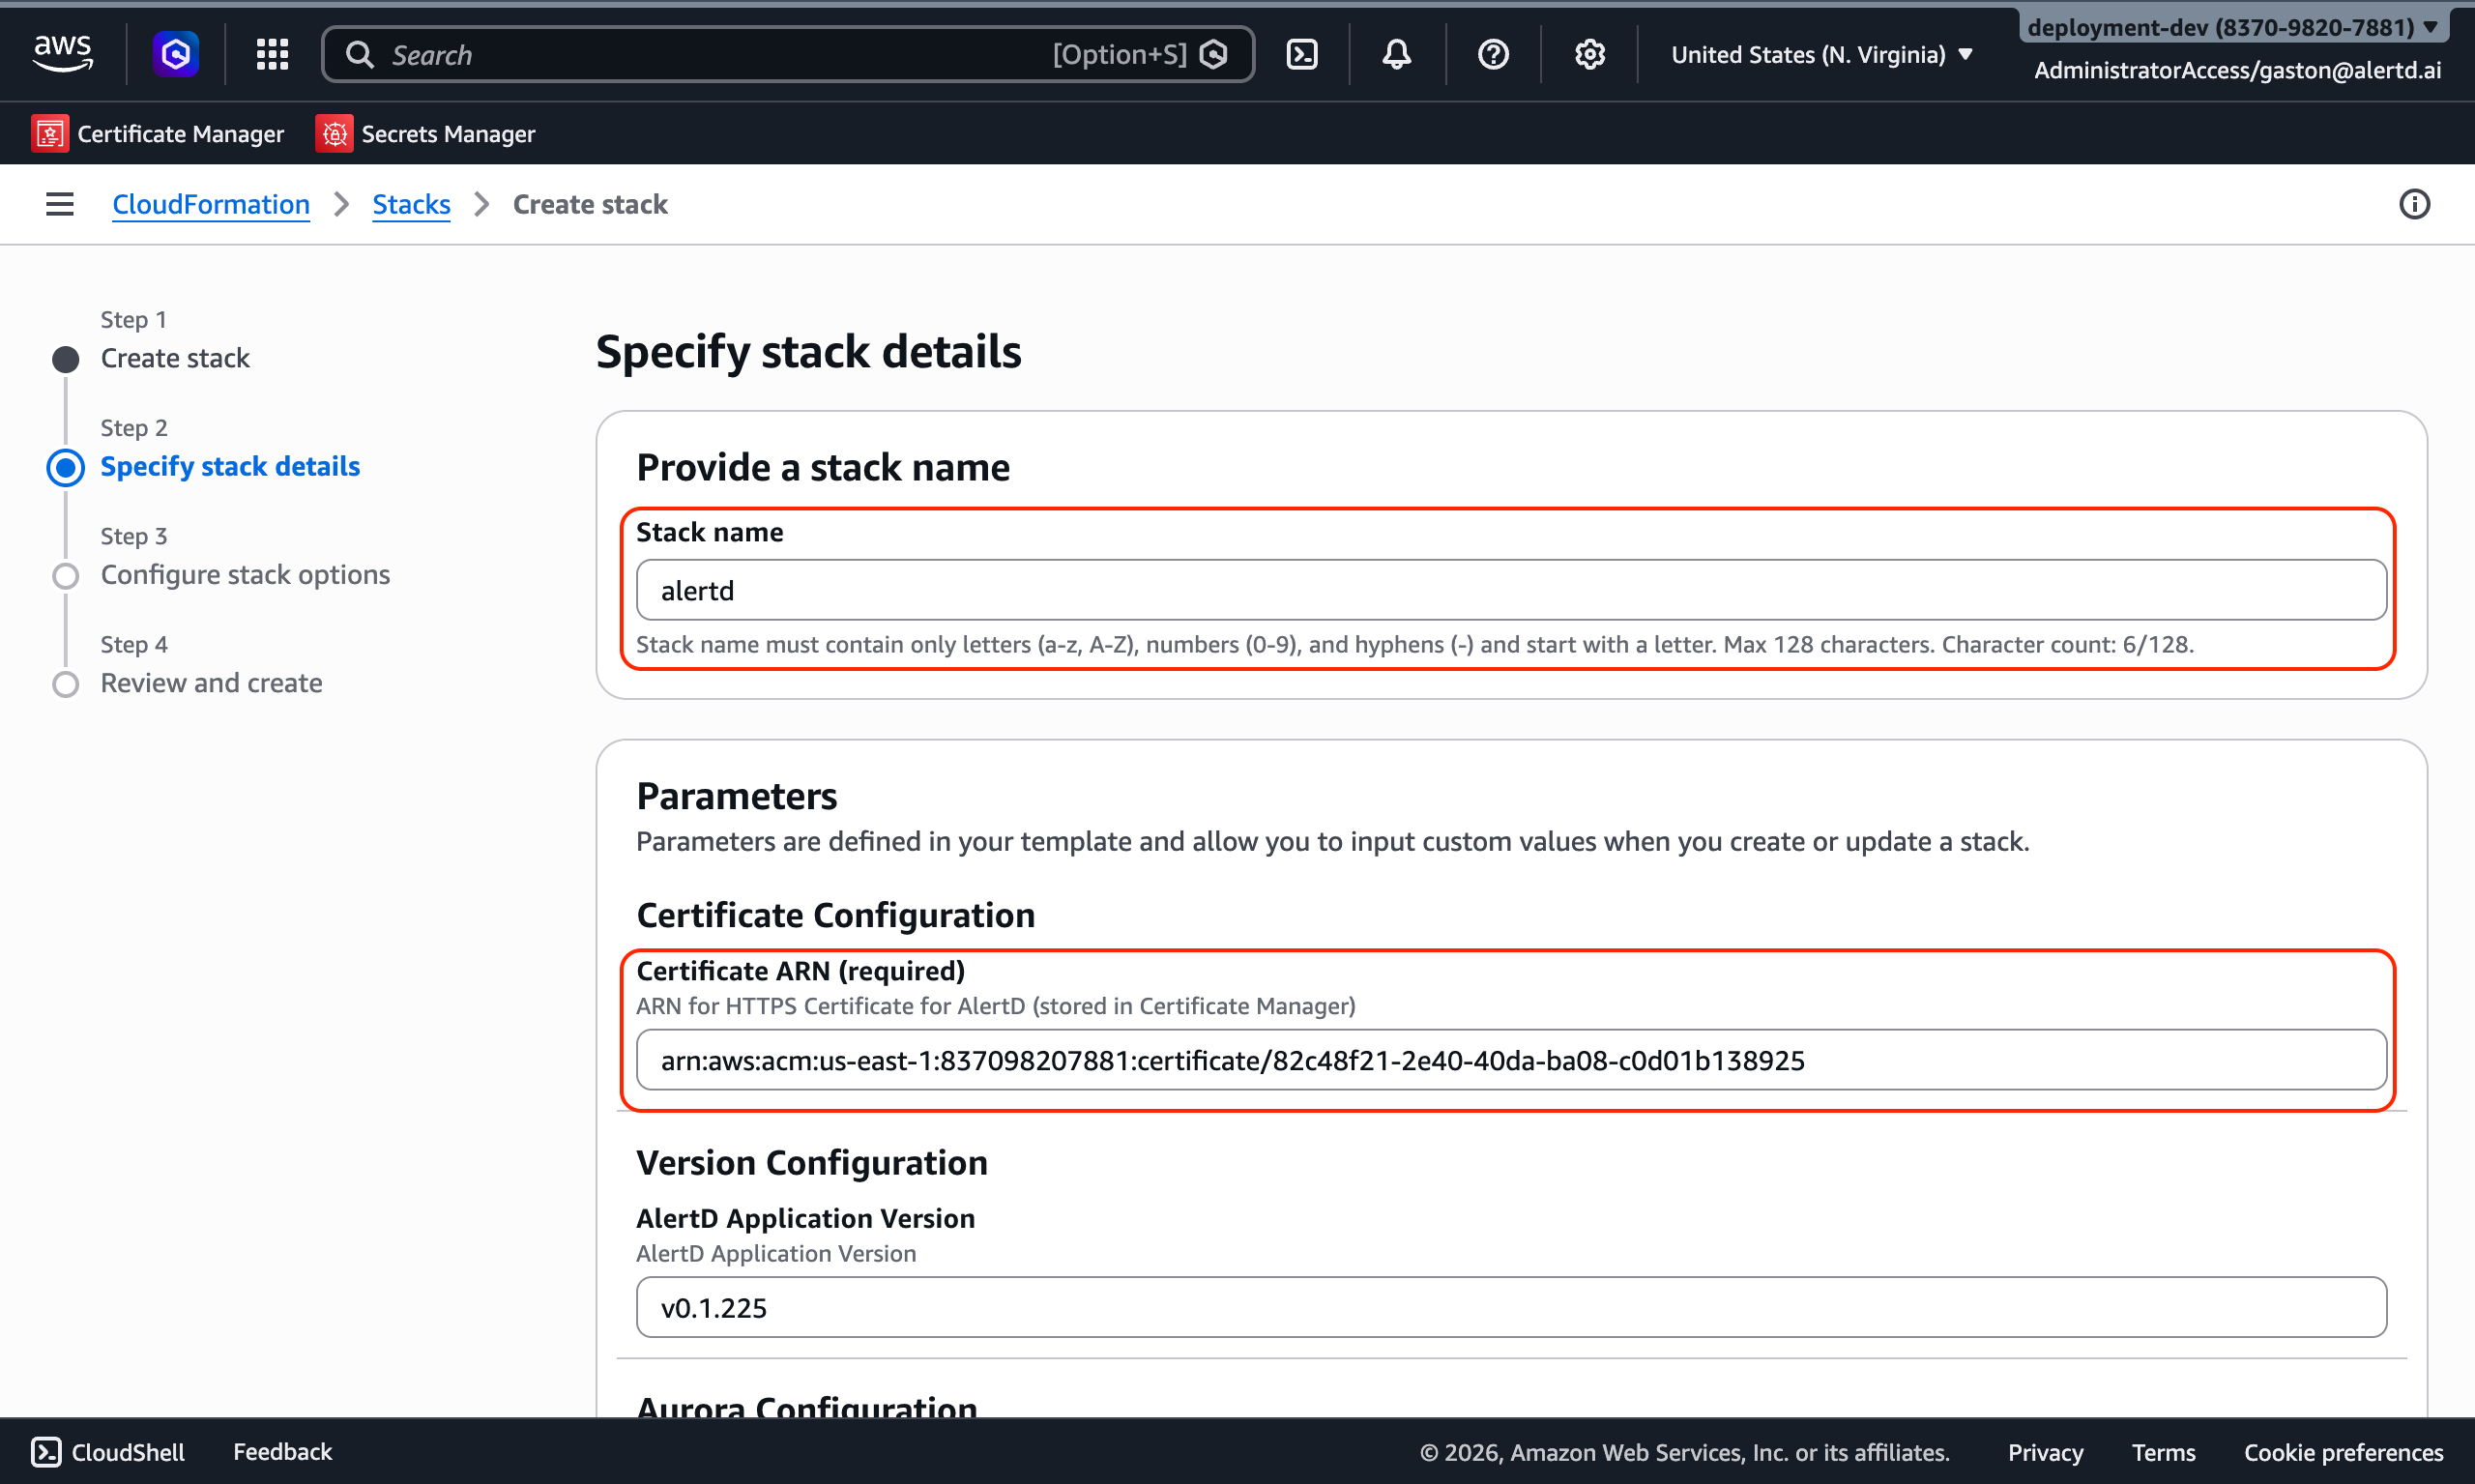
Certificate Configuration (Required)
Certificate ARN: Paste the ARN of your validated SSL certificate from AWS Certificate Manager (ACM).
- The certificate must be in the same region where you’re deploying AlertD
- Format:
arn:aws:acm:us-west-1:123456789012:certificate/... - If you don’t have a certificate yet, see the prerequisites guide
Step 5: Configure LLM Model Provider
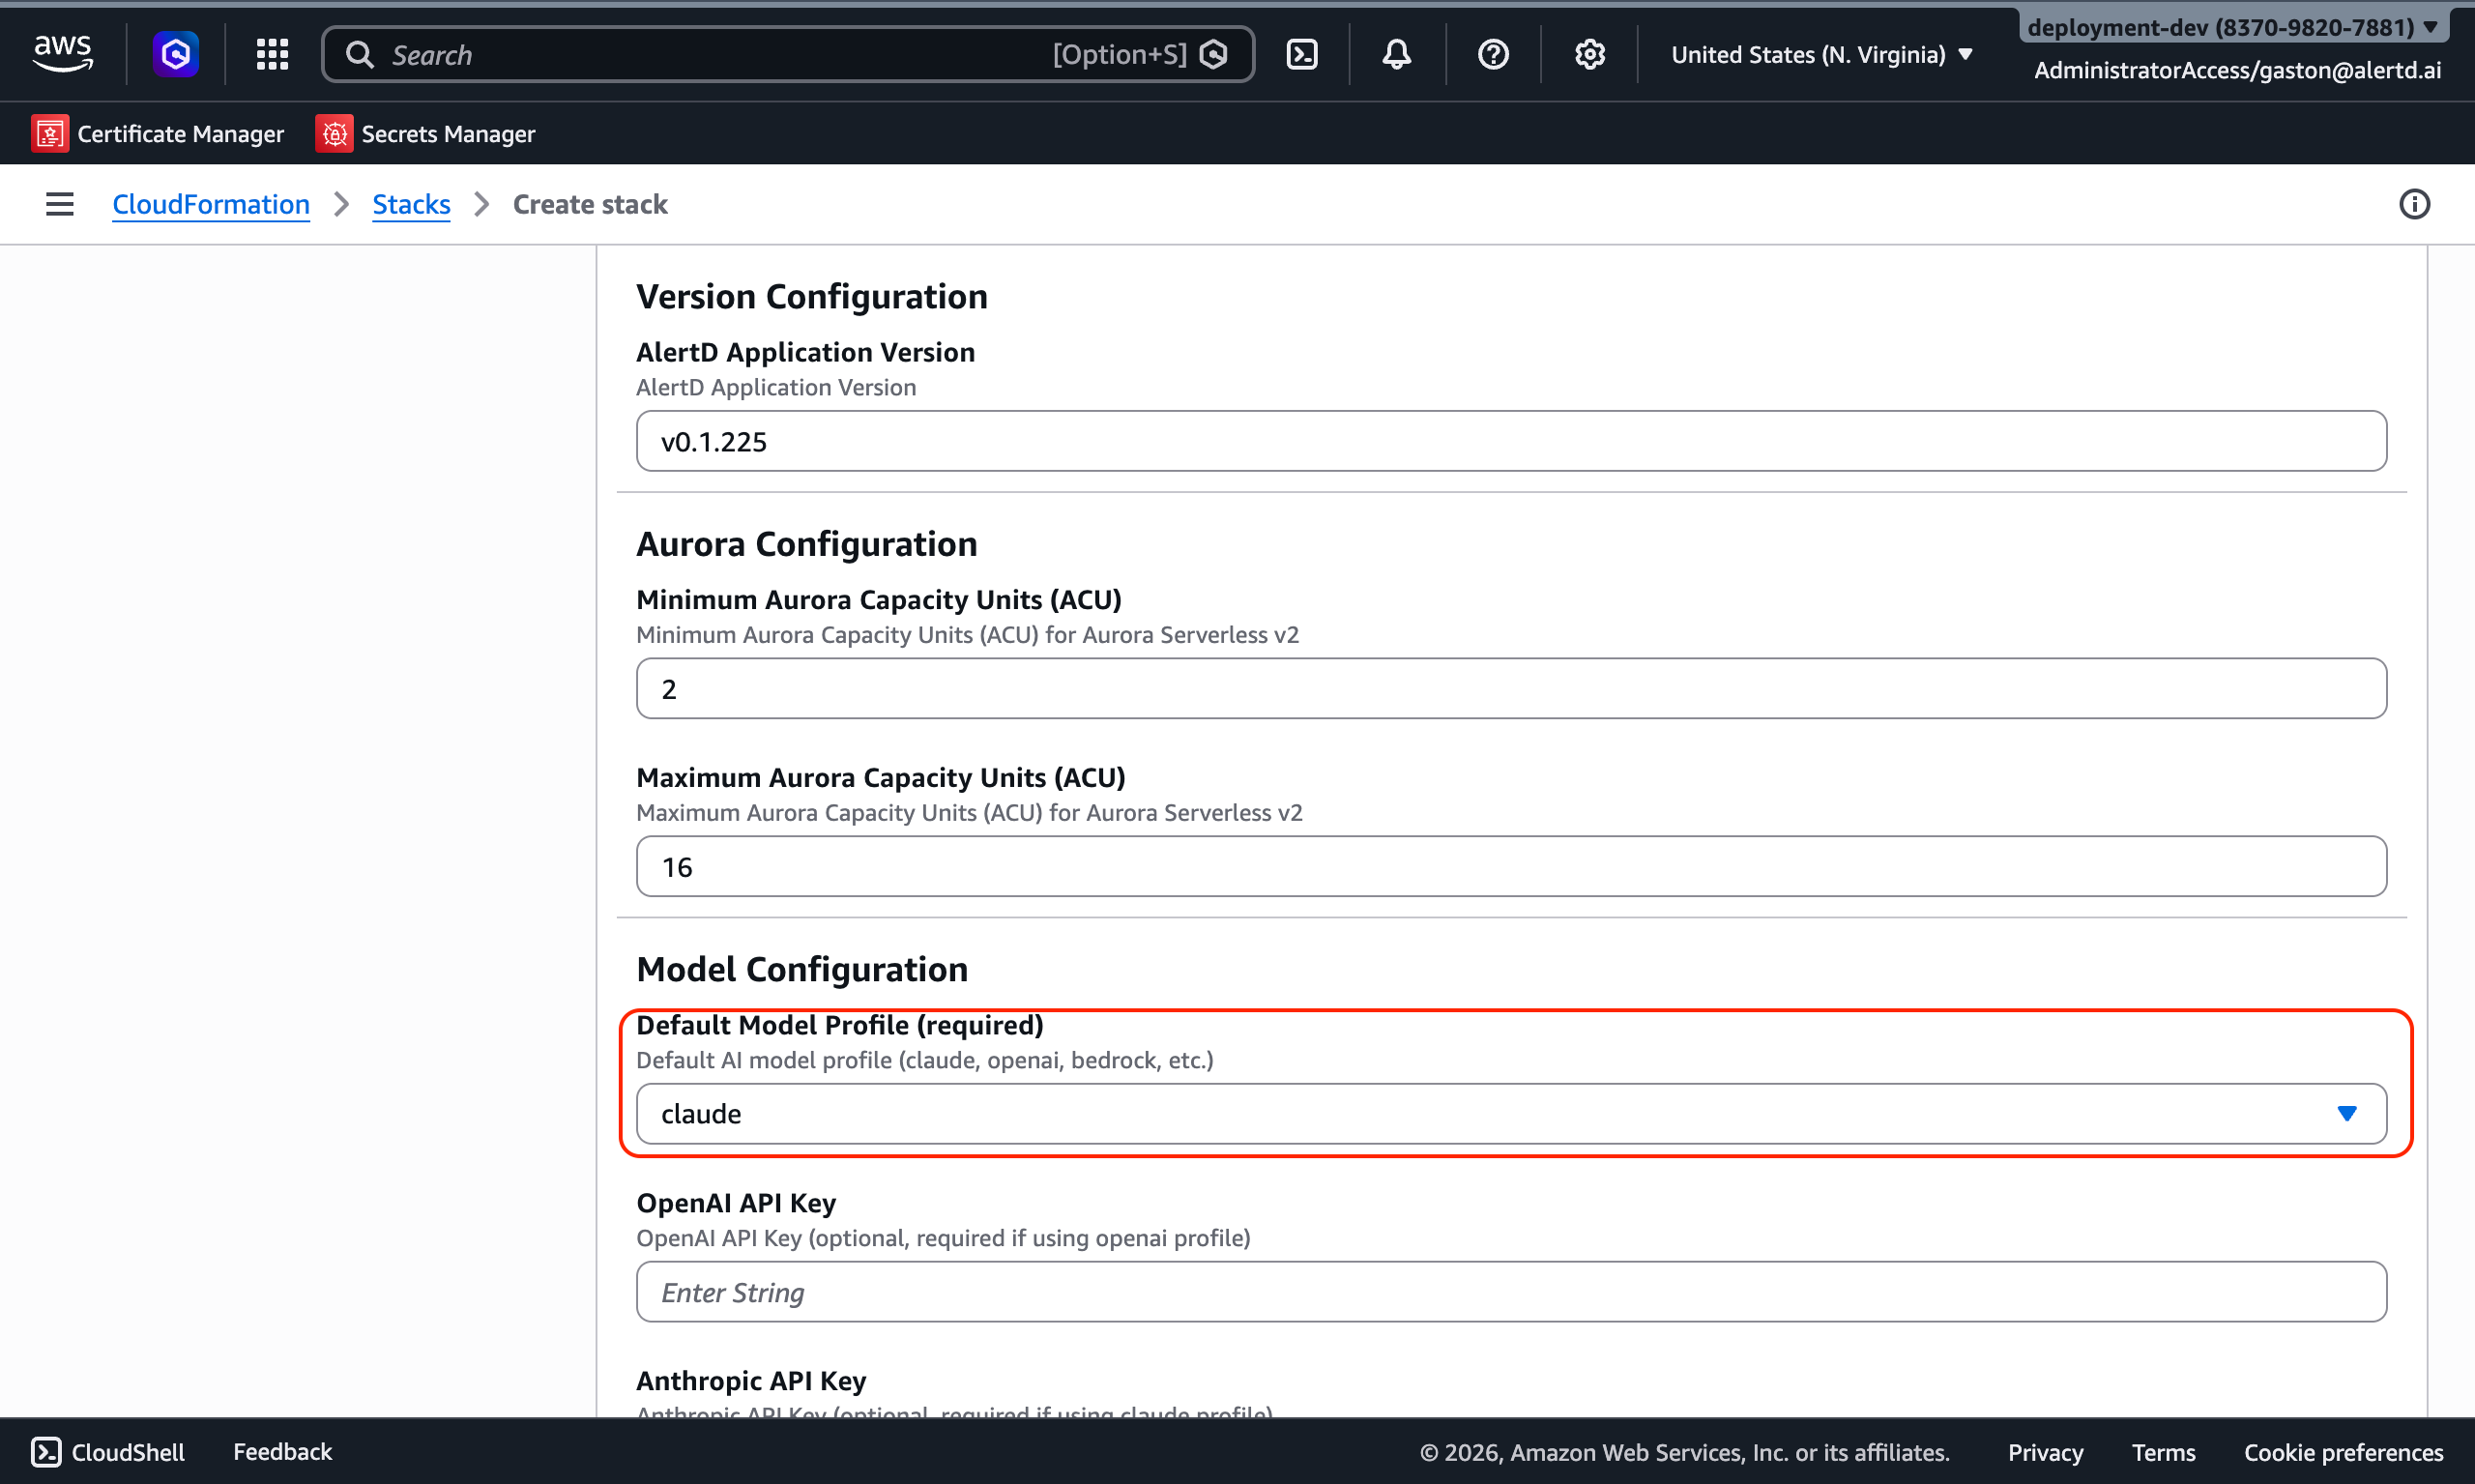
Default Model Profile (Required)
Choose your preferred AI model provider:
-
claude– Uses Anthropic Claude via Amazon Bedrock- Fully managed through AWS
- No external API calls
- Recommended if your organization already uses Bedrock
-
openai– Connects to OpenAI’s API (e.g., GPT models)- Requires entering your OpenAI API key below
-
anthropic– Uses Anthropic Claude directly through Anthropic’s public API- Not via Bedrock
- Requires your Anthropic API key below
API Keys (If Applicable)
- OpenAI API Key: Enter your key if you selected
openaiprofile - Anthropic API Key: Enter your key if you selected
anthropicprofile
API keys will be stored securely in AWS Secrets Manager. Ensure you’re using the correct key for your chosen provider.
Step 6: Configure Monitoring Role
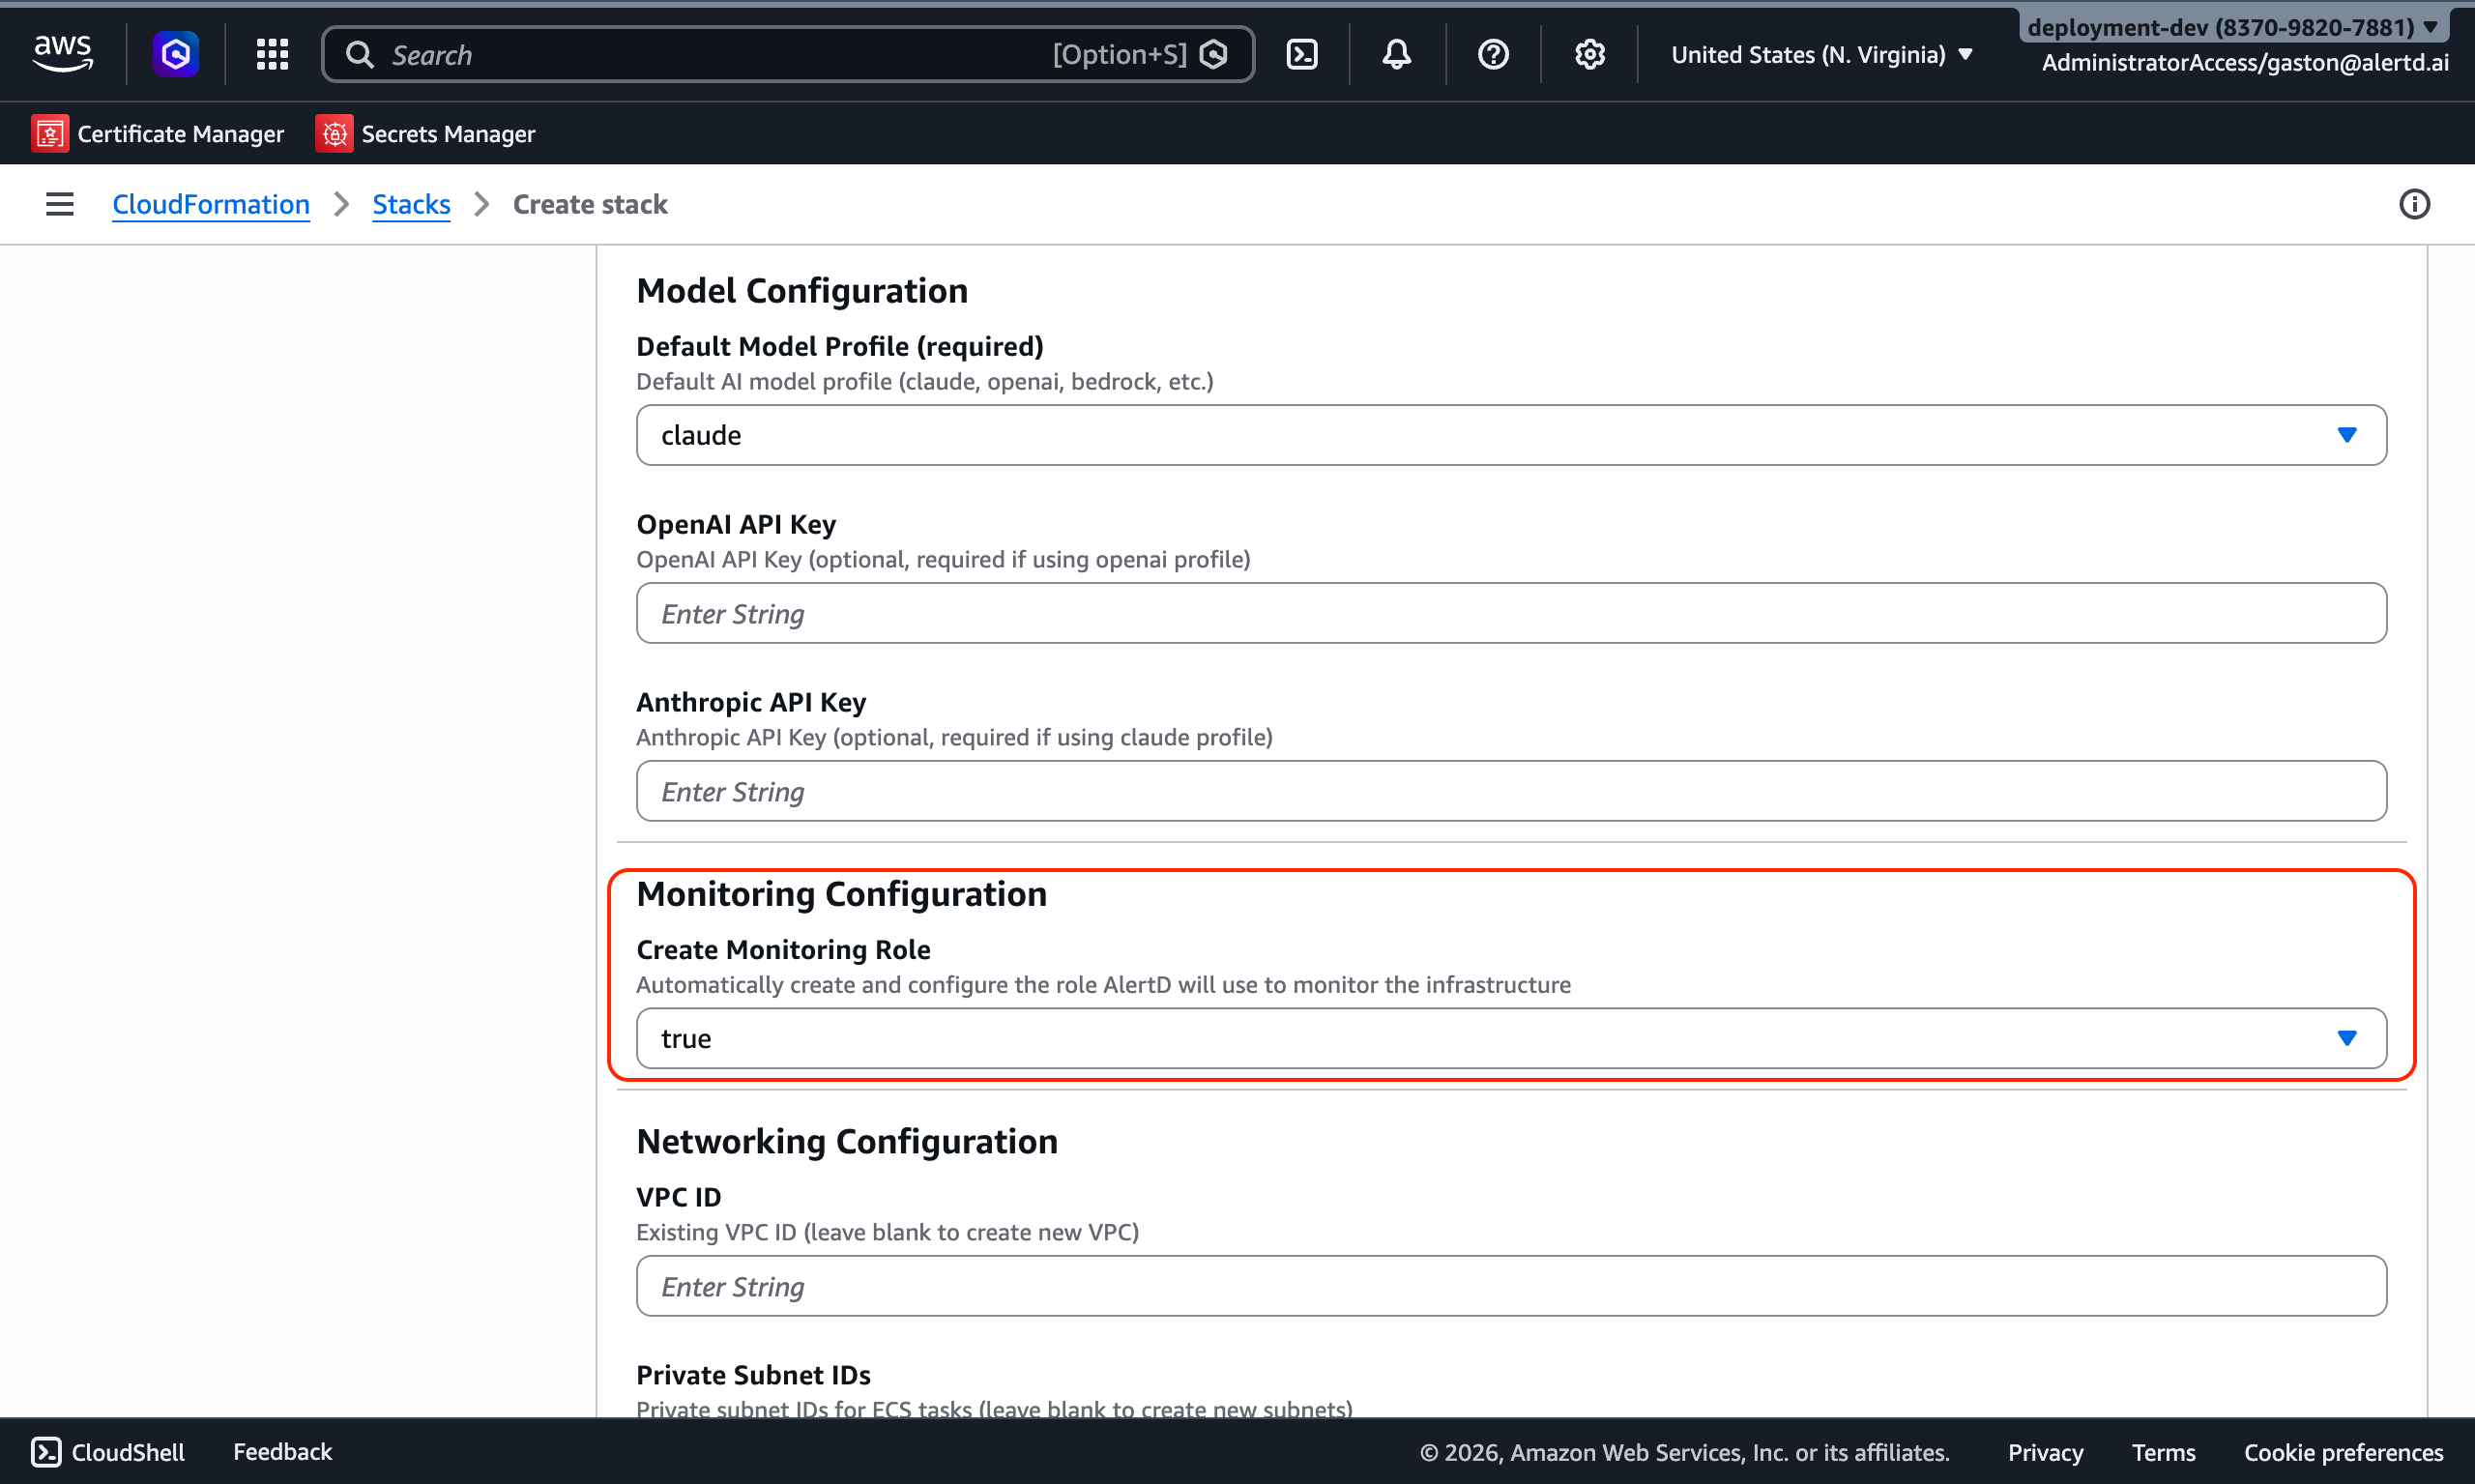
Create Monitoring Role
This parameter controls whether CloudFormation automatically creates the IAM role that AlertD uses to monitor your AWS infrastructure.
-
true(default) — Automatically creates an IAM role withReadOnlyAccessand the correct trust policy. Use this if AlertD will monitor the same AWS account it is deployed in. No manual IAM configuration is needed — proceed to Simple Setup after deployment. -
false— Does not create a monitoring role. Use this if AlertD will monitor a different AWS account. You will need to manually create the IAM role in the target account during Advanced Setup.
Most users should leave this set to true. Only set it to false if you need AlertD to monitor resources in a different AWS account than the one where AlertD is deployed.
Step 7: Configure Networking
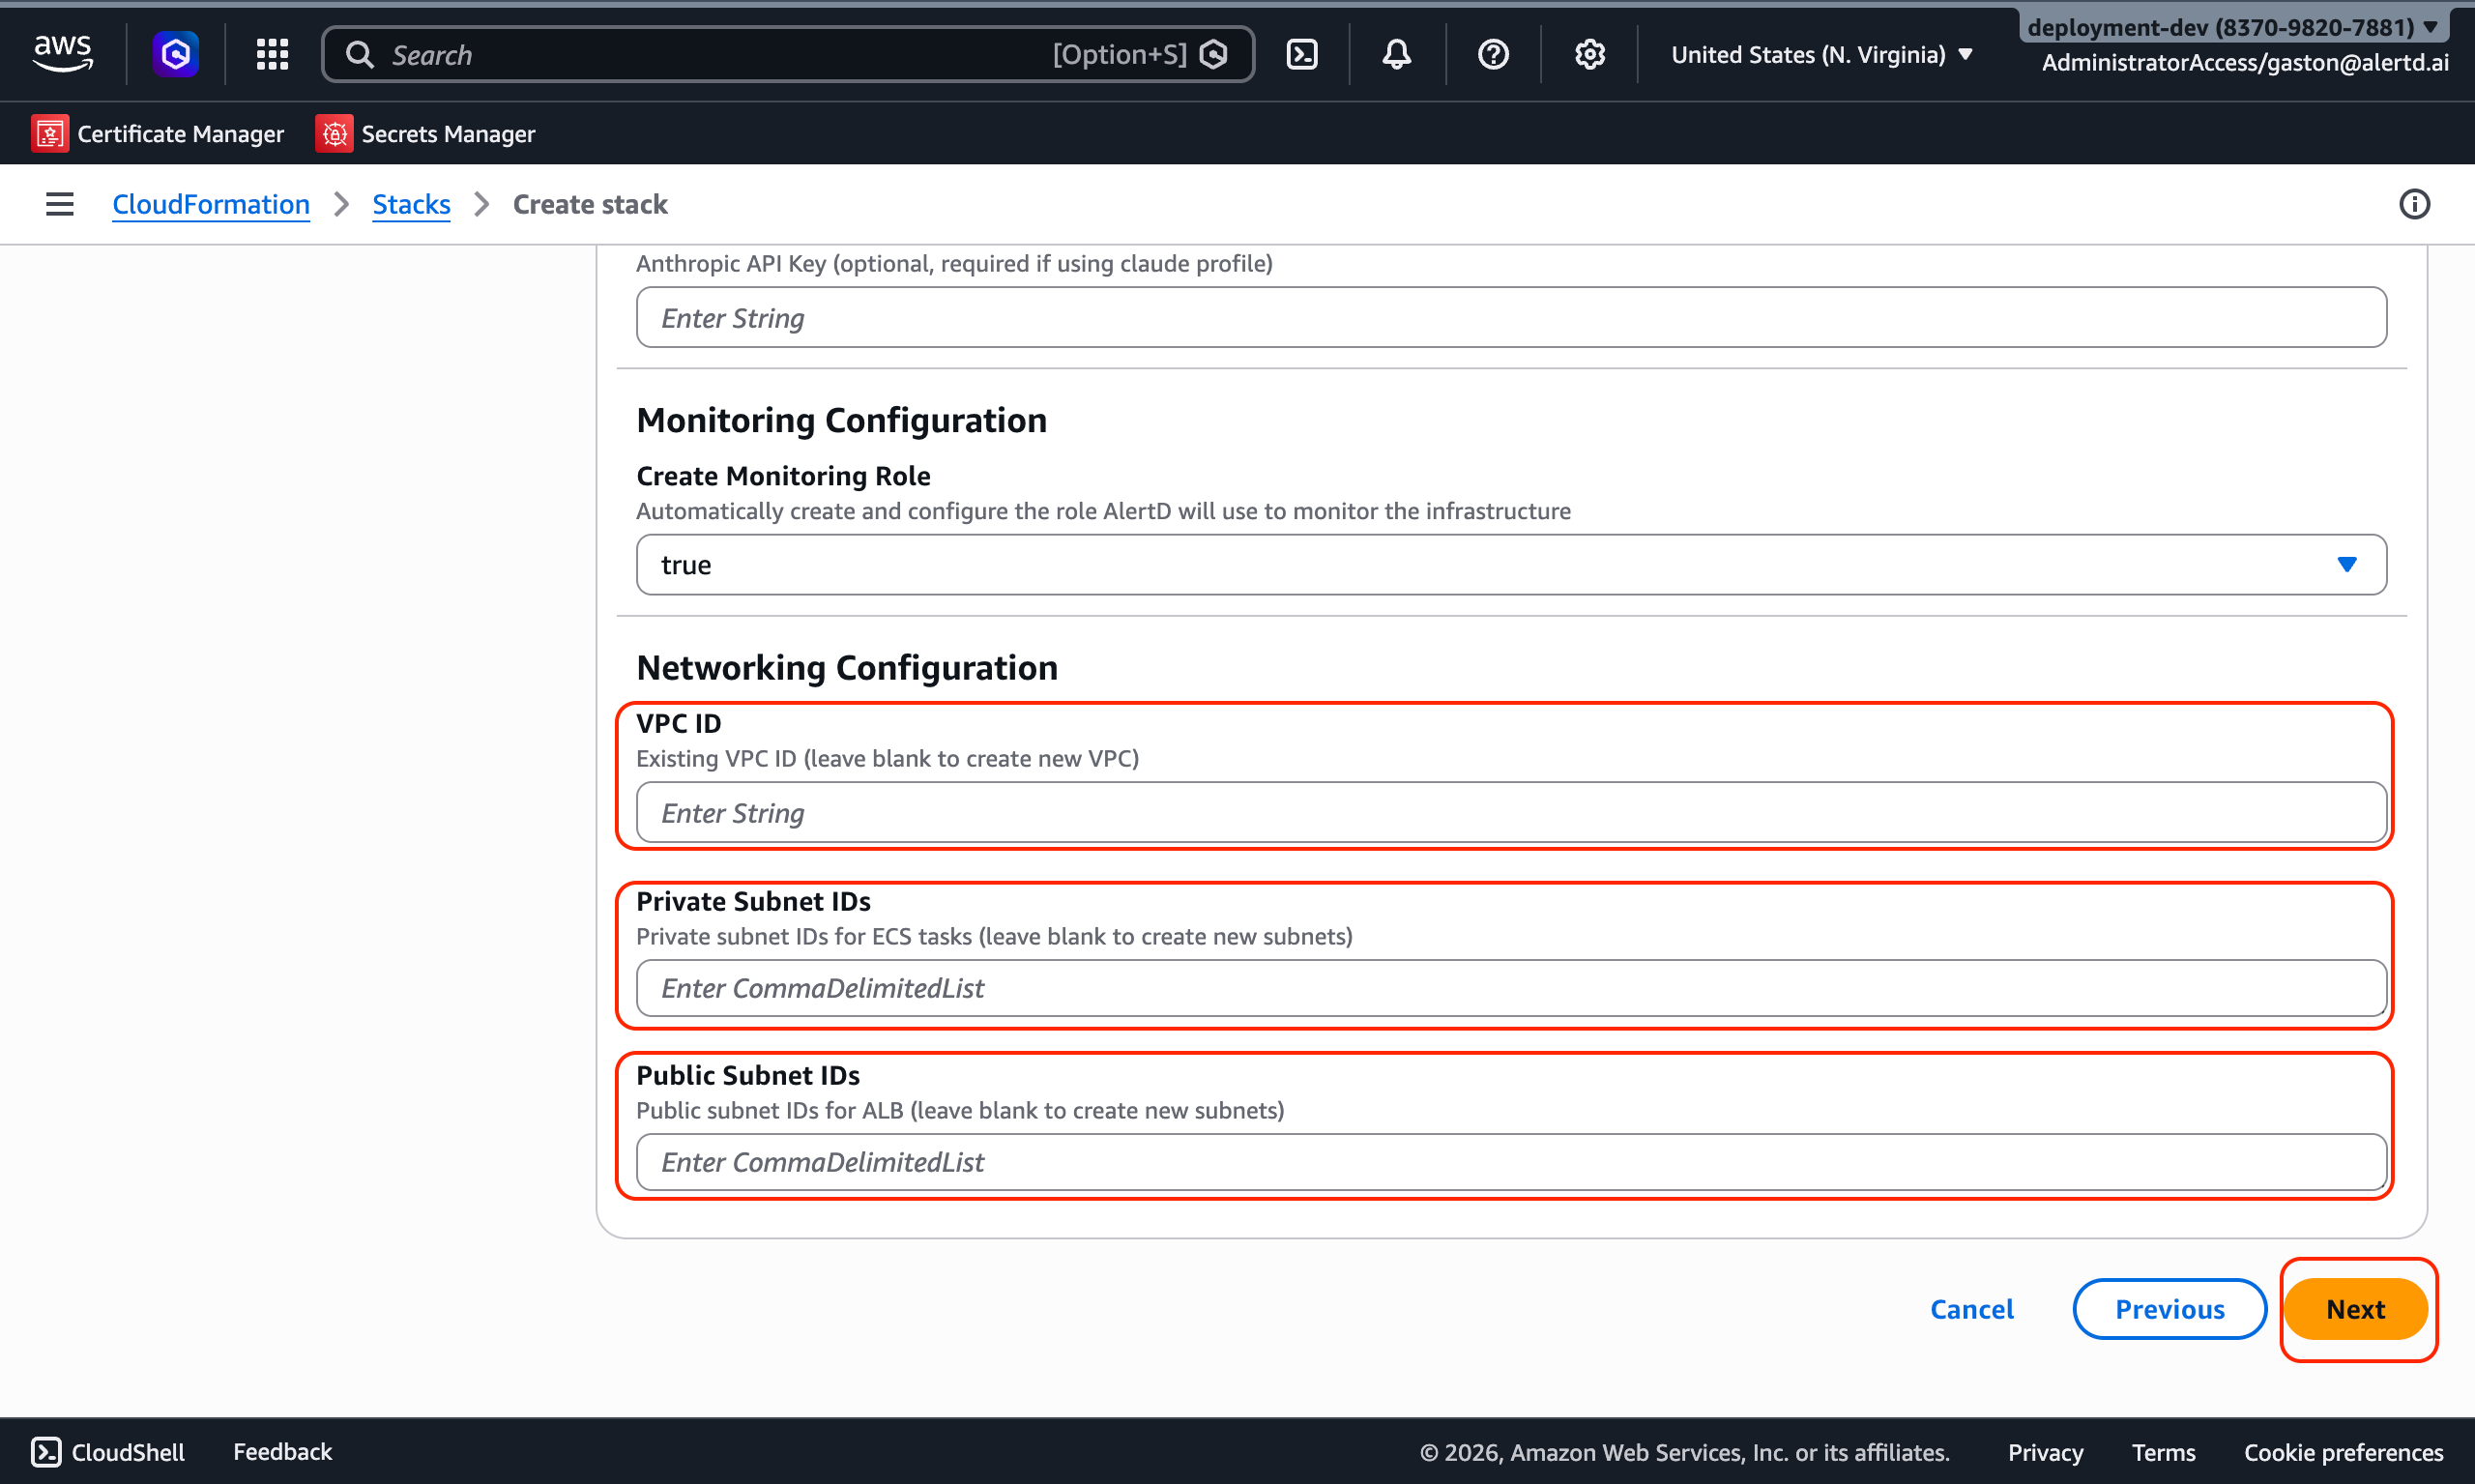
AlertD can deploy in a new VPC or use your existing network infrastructure.
Option A: New VPC (Default)
Leave all fields blank, and CloudFormation will automatically create:
- New VPC with public and private subnets across 2 availability zones
- NAT Gateway for private subnet internet access
- Security groups and routing tables
Option B: Existing VPC
If deploying into an existing VPC, provide:
- VPC ID: Your existing VPC identifier (e.g.,
vpc-0123456789abcdef0) - Private Subnet IDs: Comma-separated list of private subnet IDs for ECS tasks
- Example:
subnet-abc123,subnet-def456 - Must have outbound internet access via NAT Gateway
- Example:
- Public Subnet IDs: Comma-separated list of public subnet IDs for the load balancer
- Example:
subnet-ghi789,subnet-jkl012
- Example:
When using existing VPC, ensure subnets span at least 2 availability zones for high availability.
Click Next to continue.
Step 8: Configure Stack Options
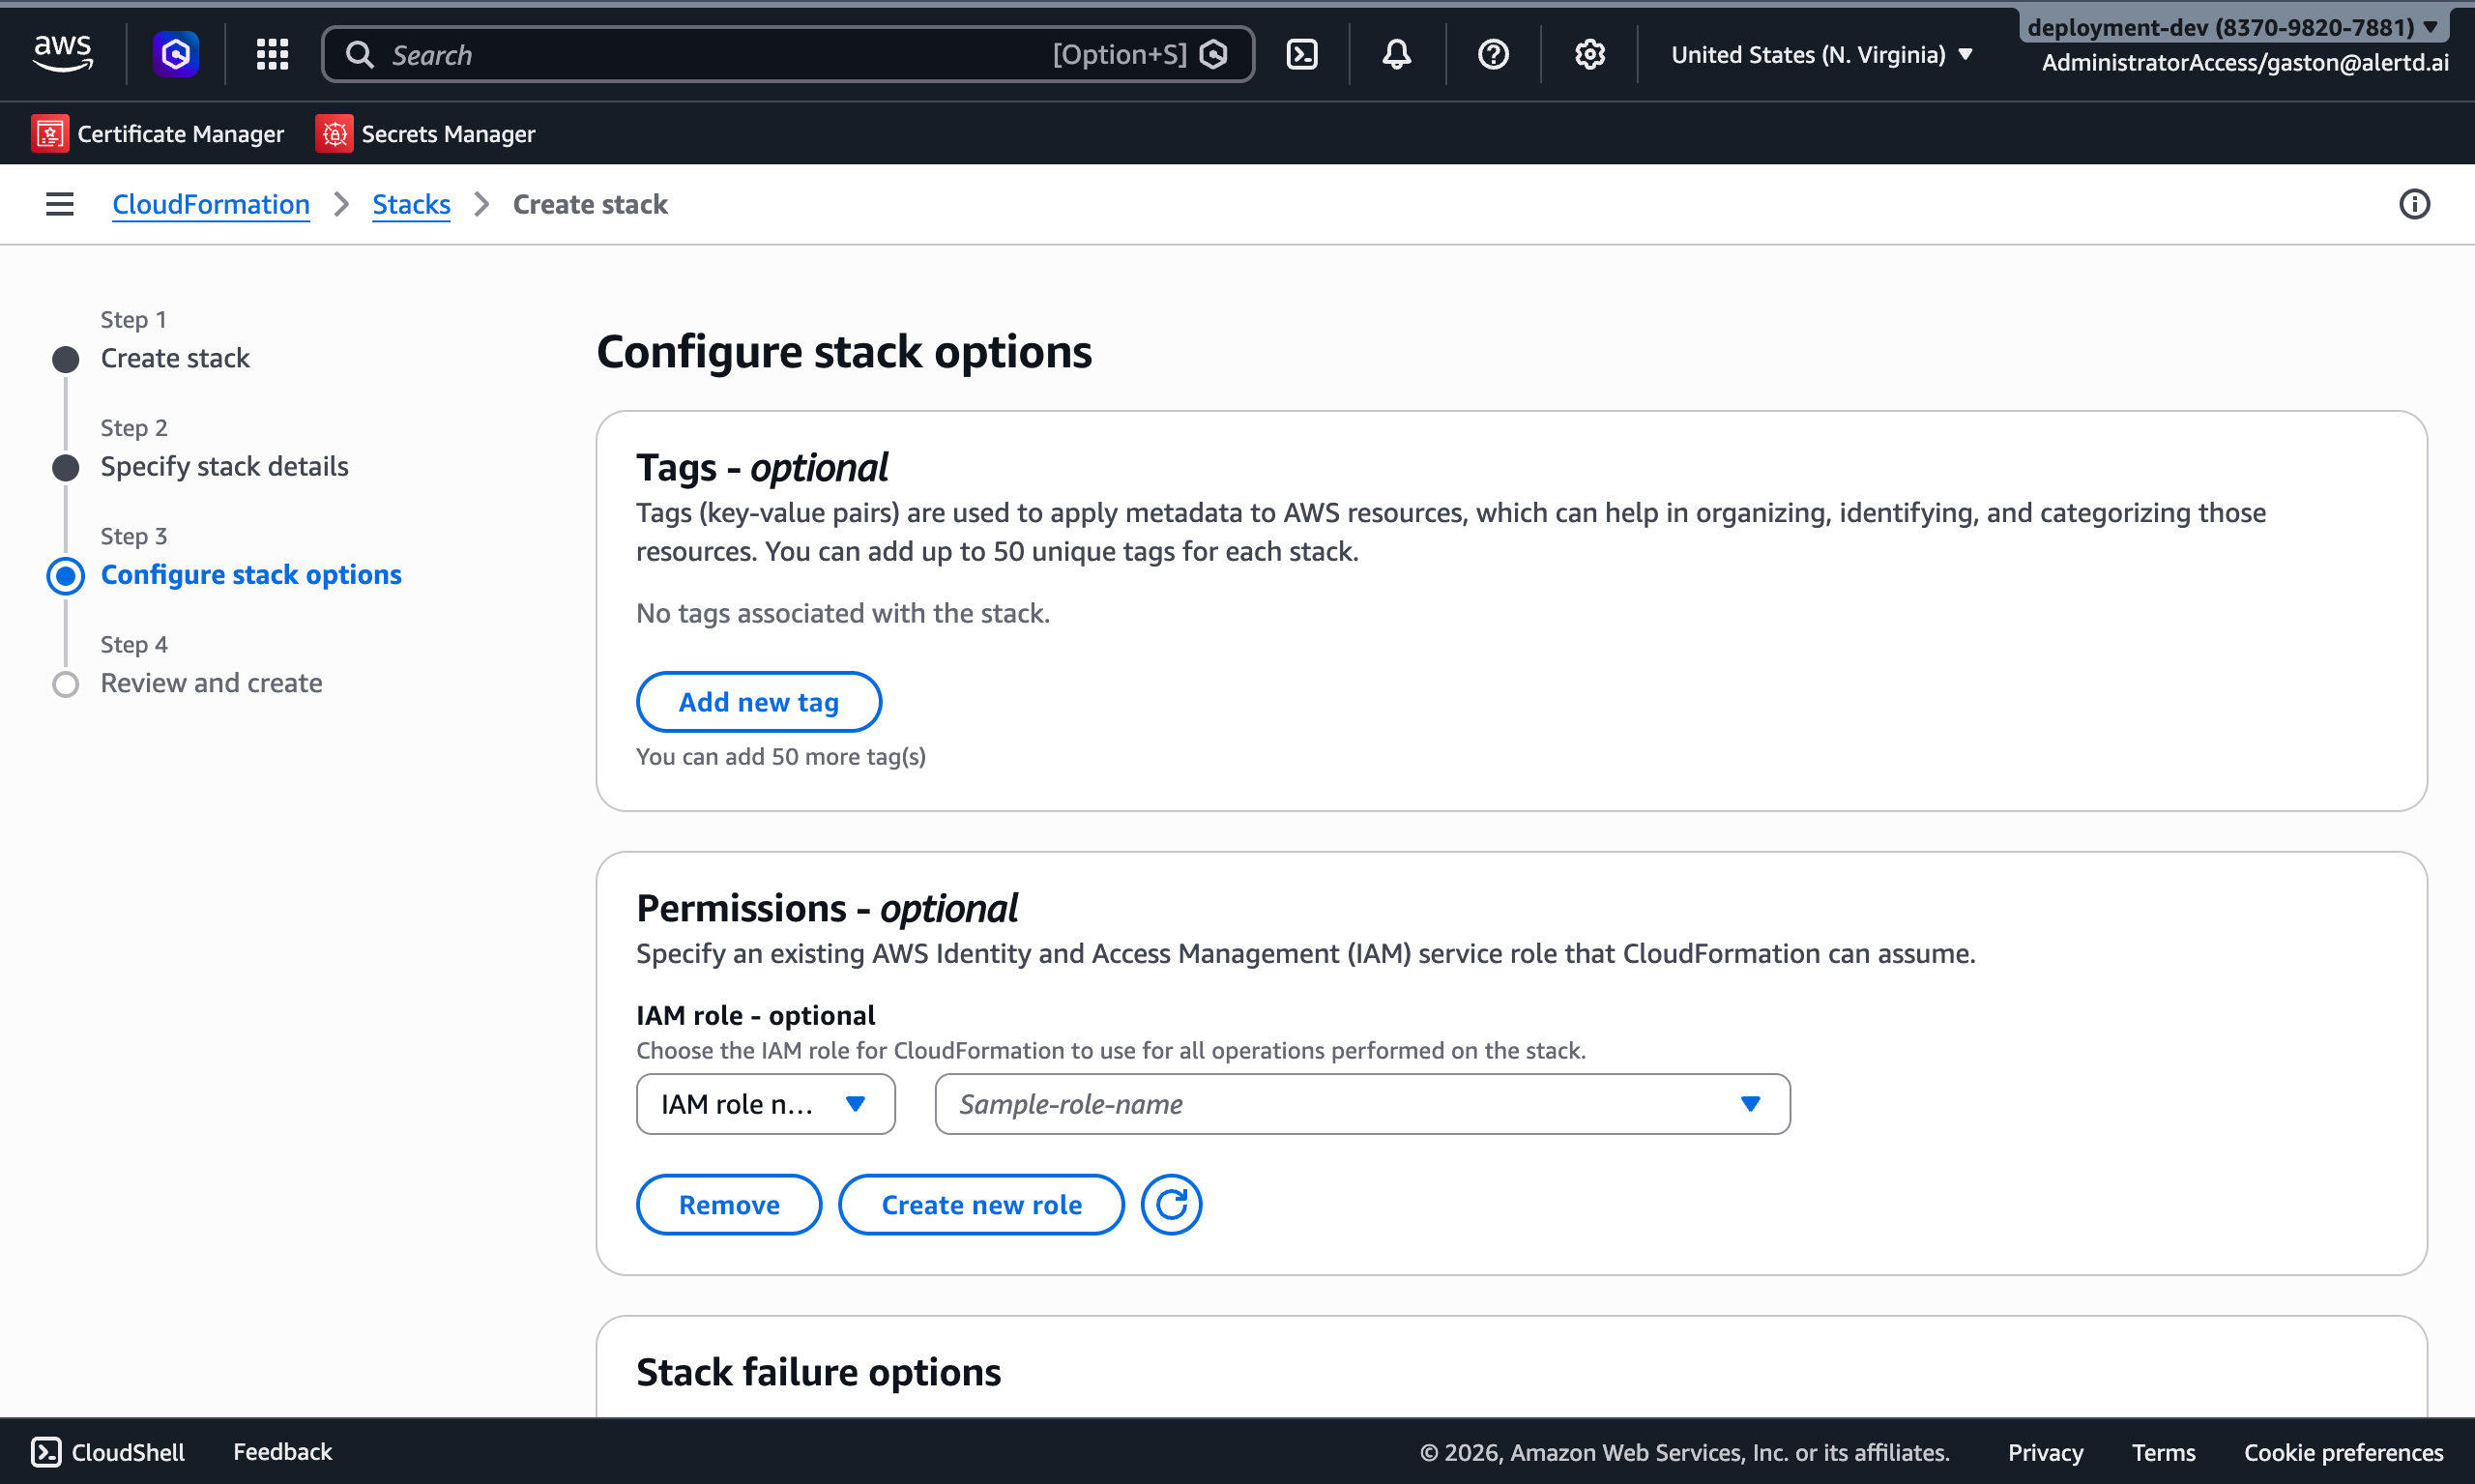
On the Configure stack options page:
- (Optional) Add tags to help identify your resources
- Example:
Environment: Production,Team: DevOps
- Example:
- (Optional) Assign an IAM Role for CloudFormation
- Leave blank to use your current credentials
- Keep rollback, notification, and timeout settings as default
Scroll down to the capabilities section.
Step 9: Acknowledge IAM Resource Creation
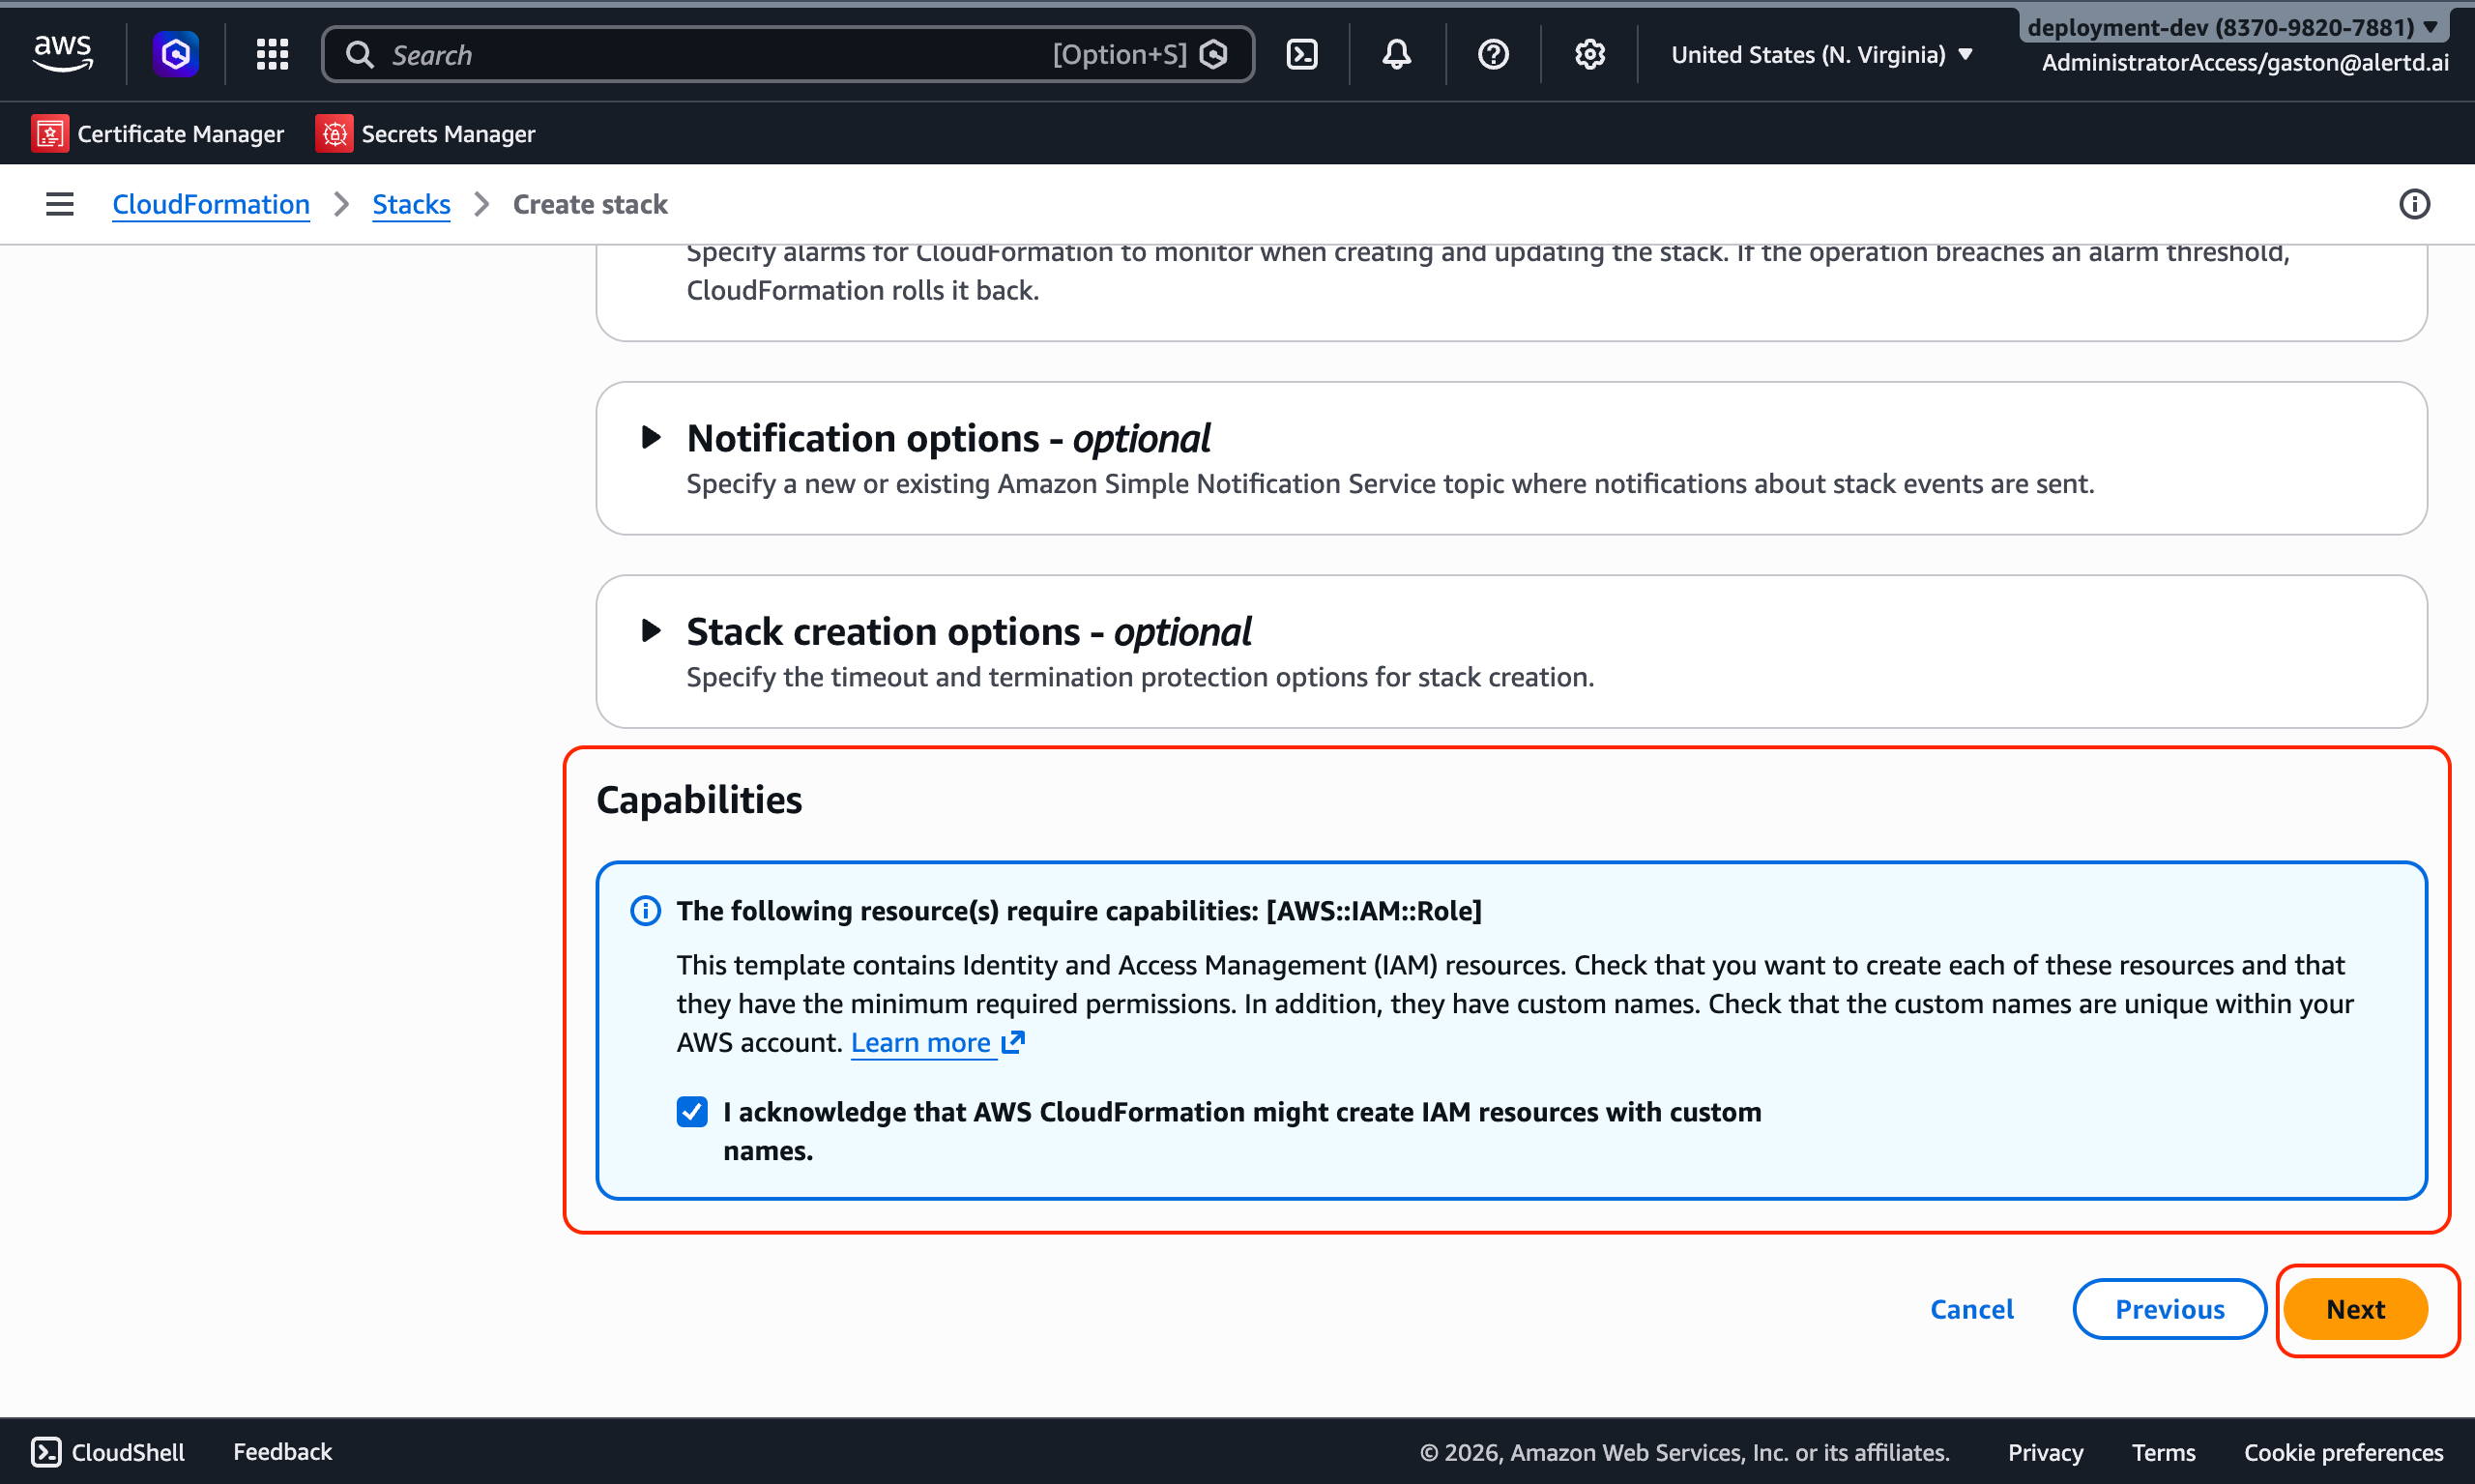
CloudFormation needs permission to create IAM roles and resources for AlertD.
- Locate the Capabilities section at the bottom of the page
- Check the box that states:
☑ I acknowledge that AWS CloudFormation might create IAM resources with custom names.- This acknowledgment is required because AlertD creates:
- ECS task execution roles
- Service-linked roles for ECS and ELB
- CloudWatch logging roles
Click Next to proceed to the review page.
Step 10: Review and Submit
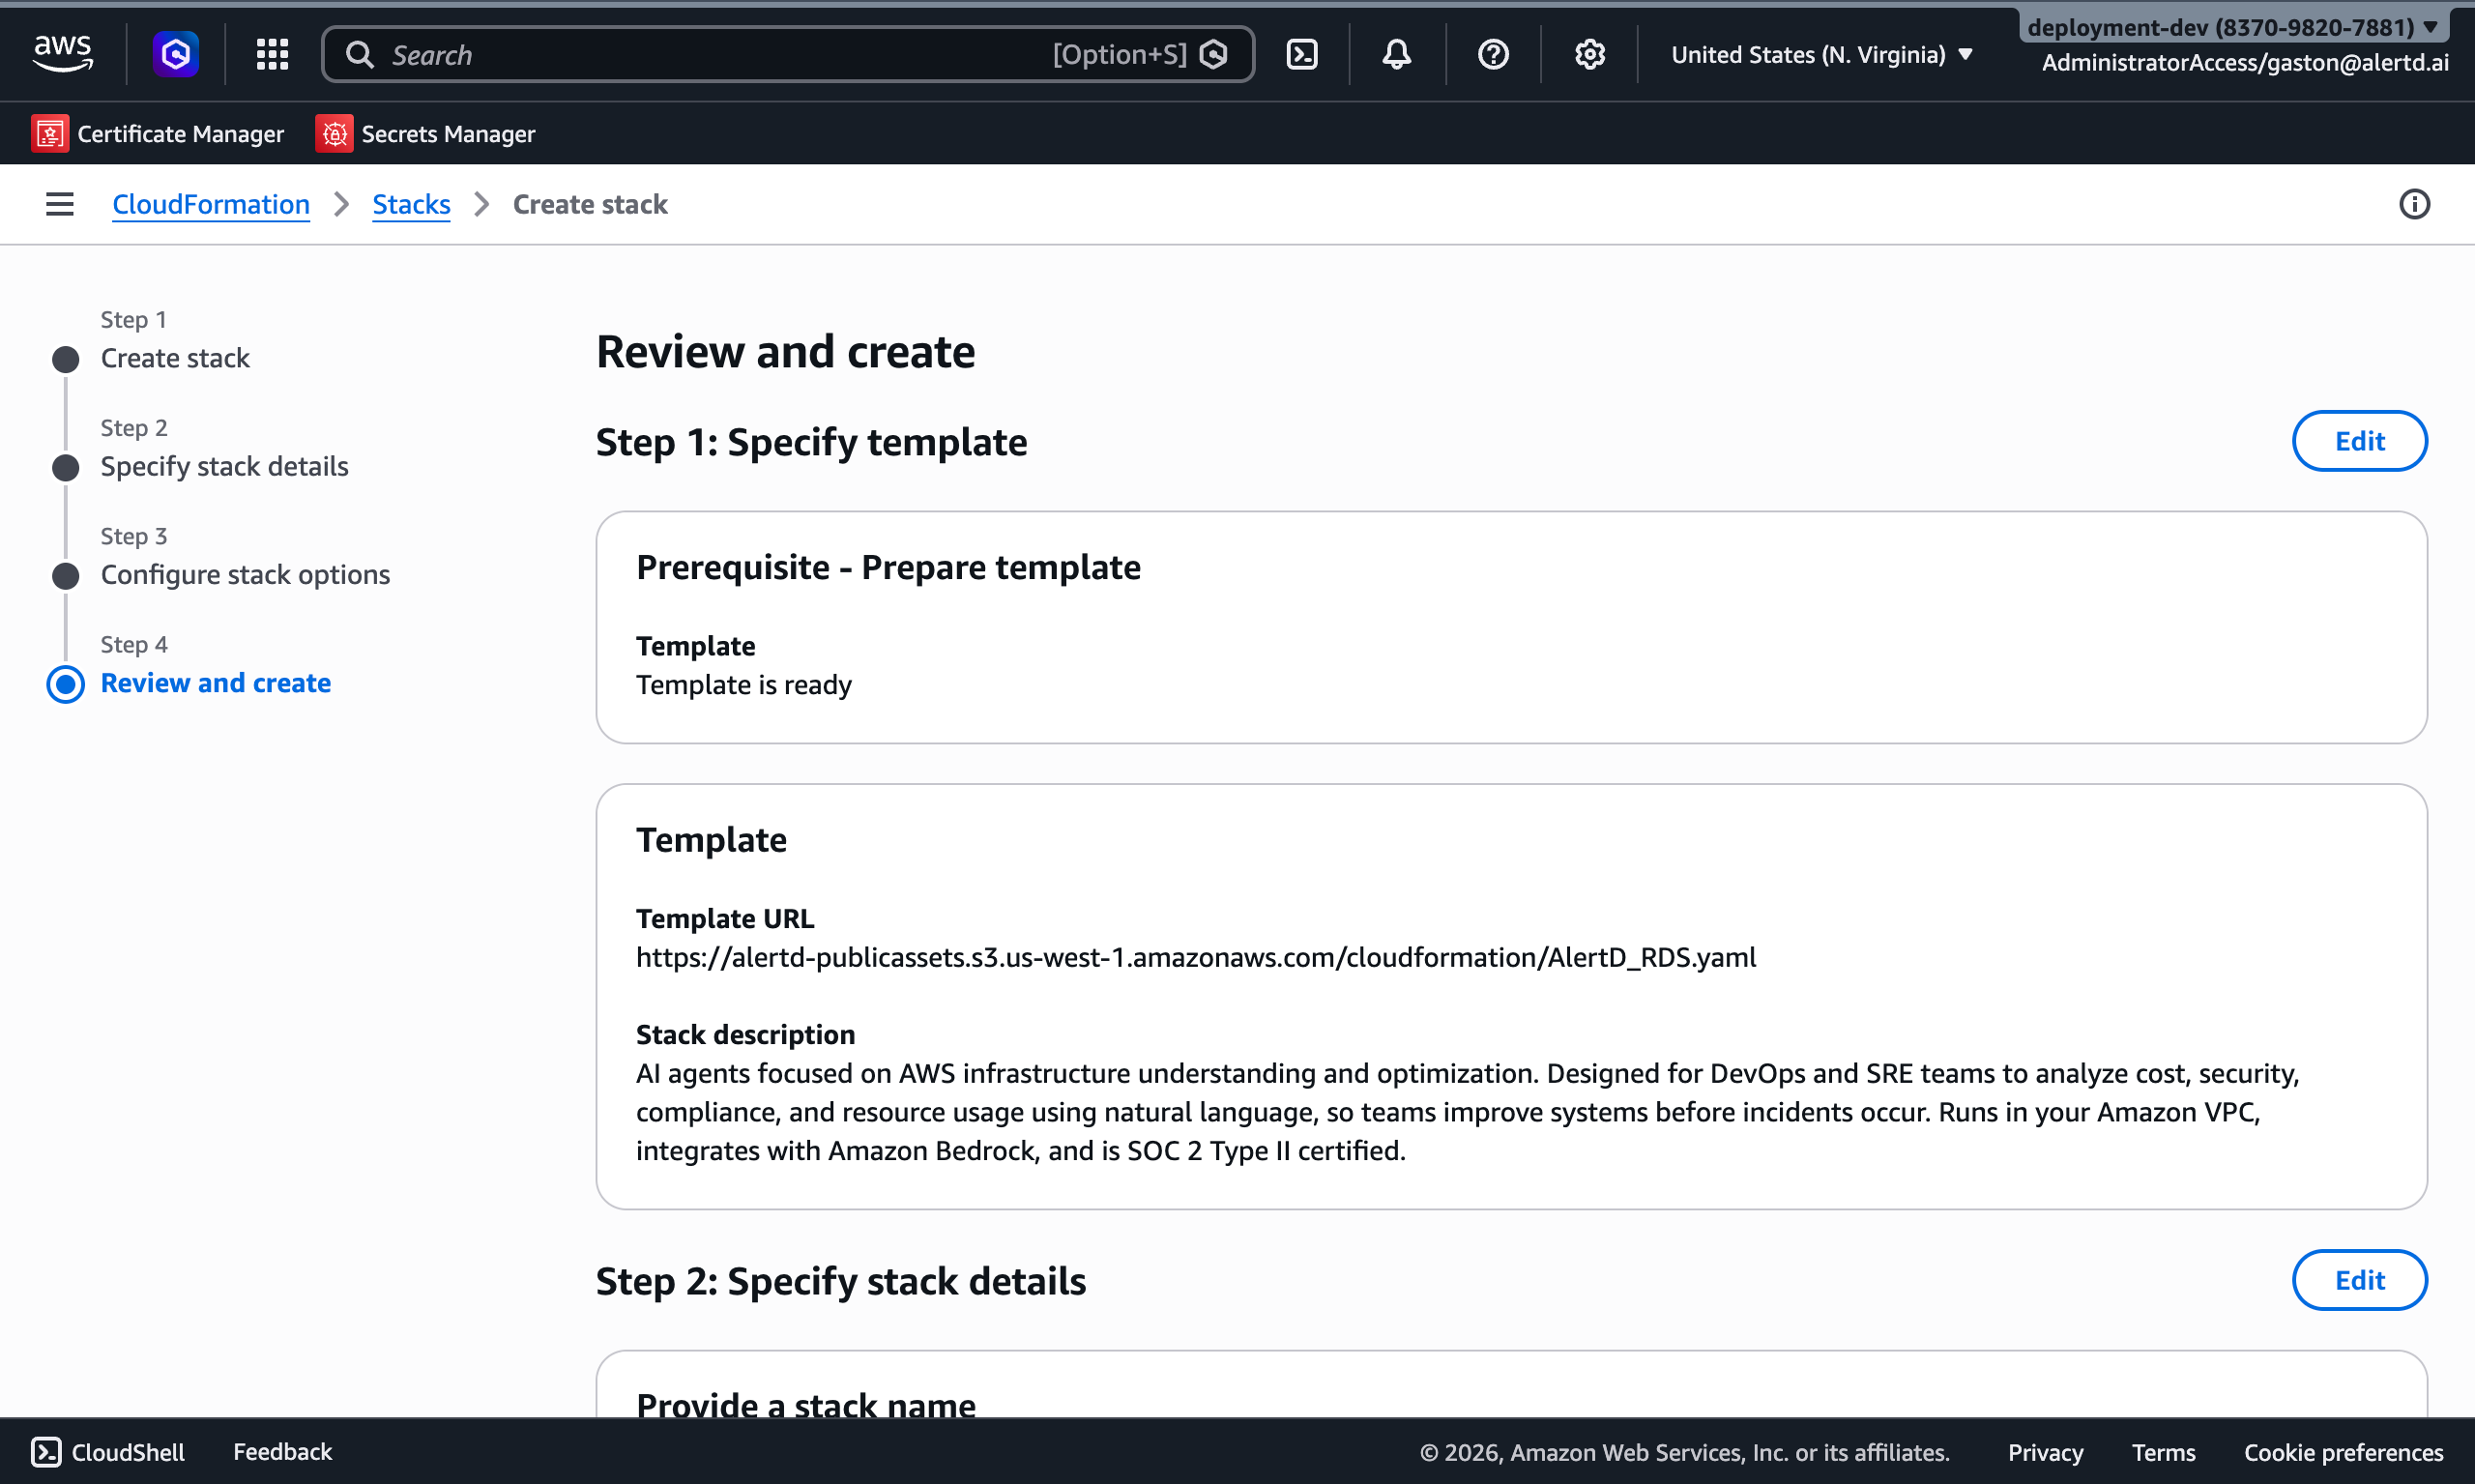
The Review and create page displays a summary of all your configuration:
Review These Critical Settings:
- Template URL: Verify it points to the AlertD CloudFormation template
- Stack Name: Confirm stack name is correct
- Certificate ARN: Double-check your ACM certificate ARN
- Model Configuration: Verify your chosen LLM provider and API key (if applicable)
- Networking Configuration: Confirm VPC and subnet settings
Submit the Stack
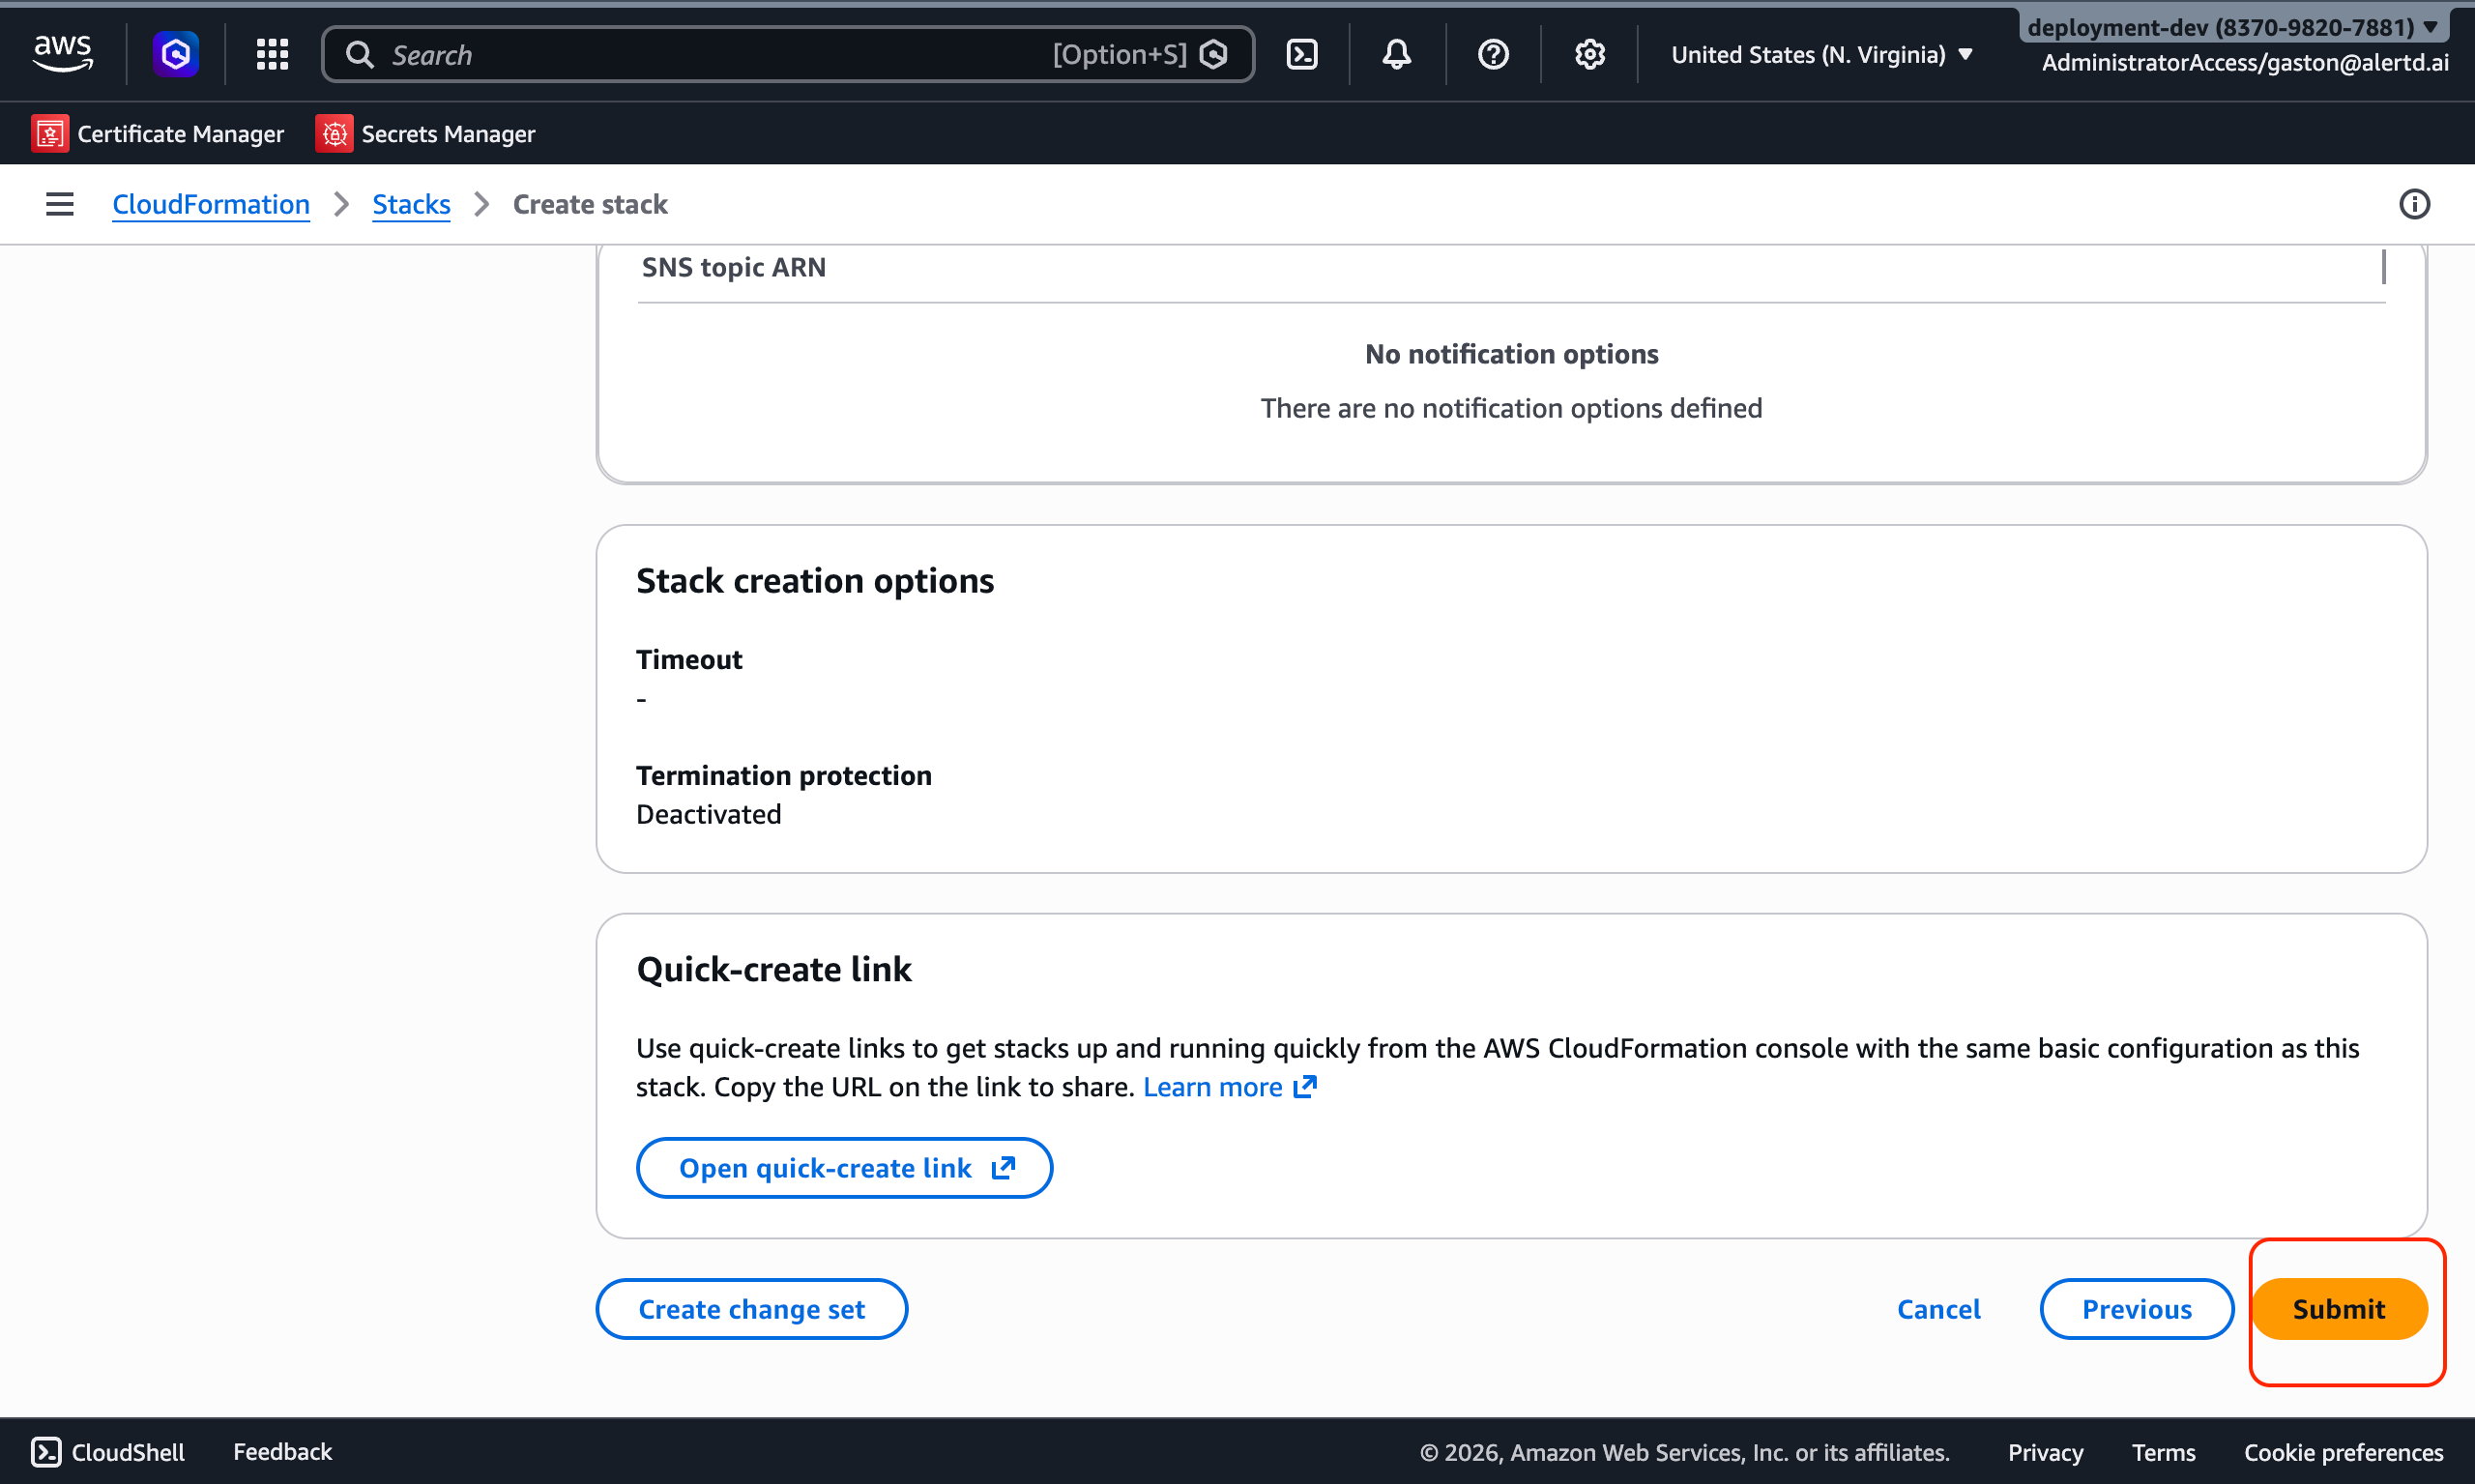
- Carefully review all parameters
- If everything looks correct, click Submit at the bottom of the page
- CloudFormation will begin creating your AlertD infrastructure
Step 11: Monitor Stack Creation

After submission, CloudFormation begins provisioning resources:
- The stack status will show CREATE_IN_PROGRESS
- You can monitor progress in the Events tab
- CloudFormation creates resources in this order:
- VPC, subnets, and networking components (if new VPC)
- Security groups
- ECS cluster
- Aurora Serverless v2 (PostgreSQL-compatible) cluster
- Pulsar task definition
- Application task definition
- Load balancer and target groups
- ECS services
Expected duration: 10-15 minutes
You can safely close this window and return later. CloudFormation will continue running in the background.
Step 12: Verify Stack Completion
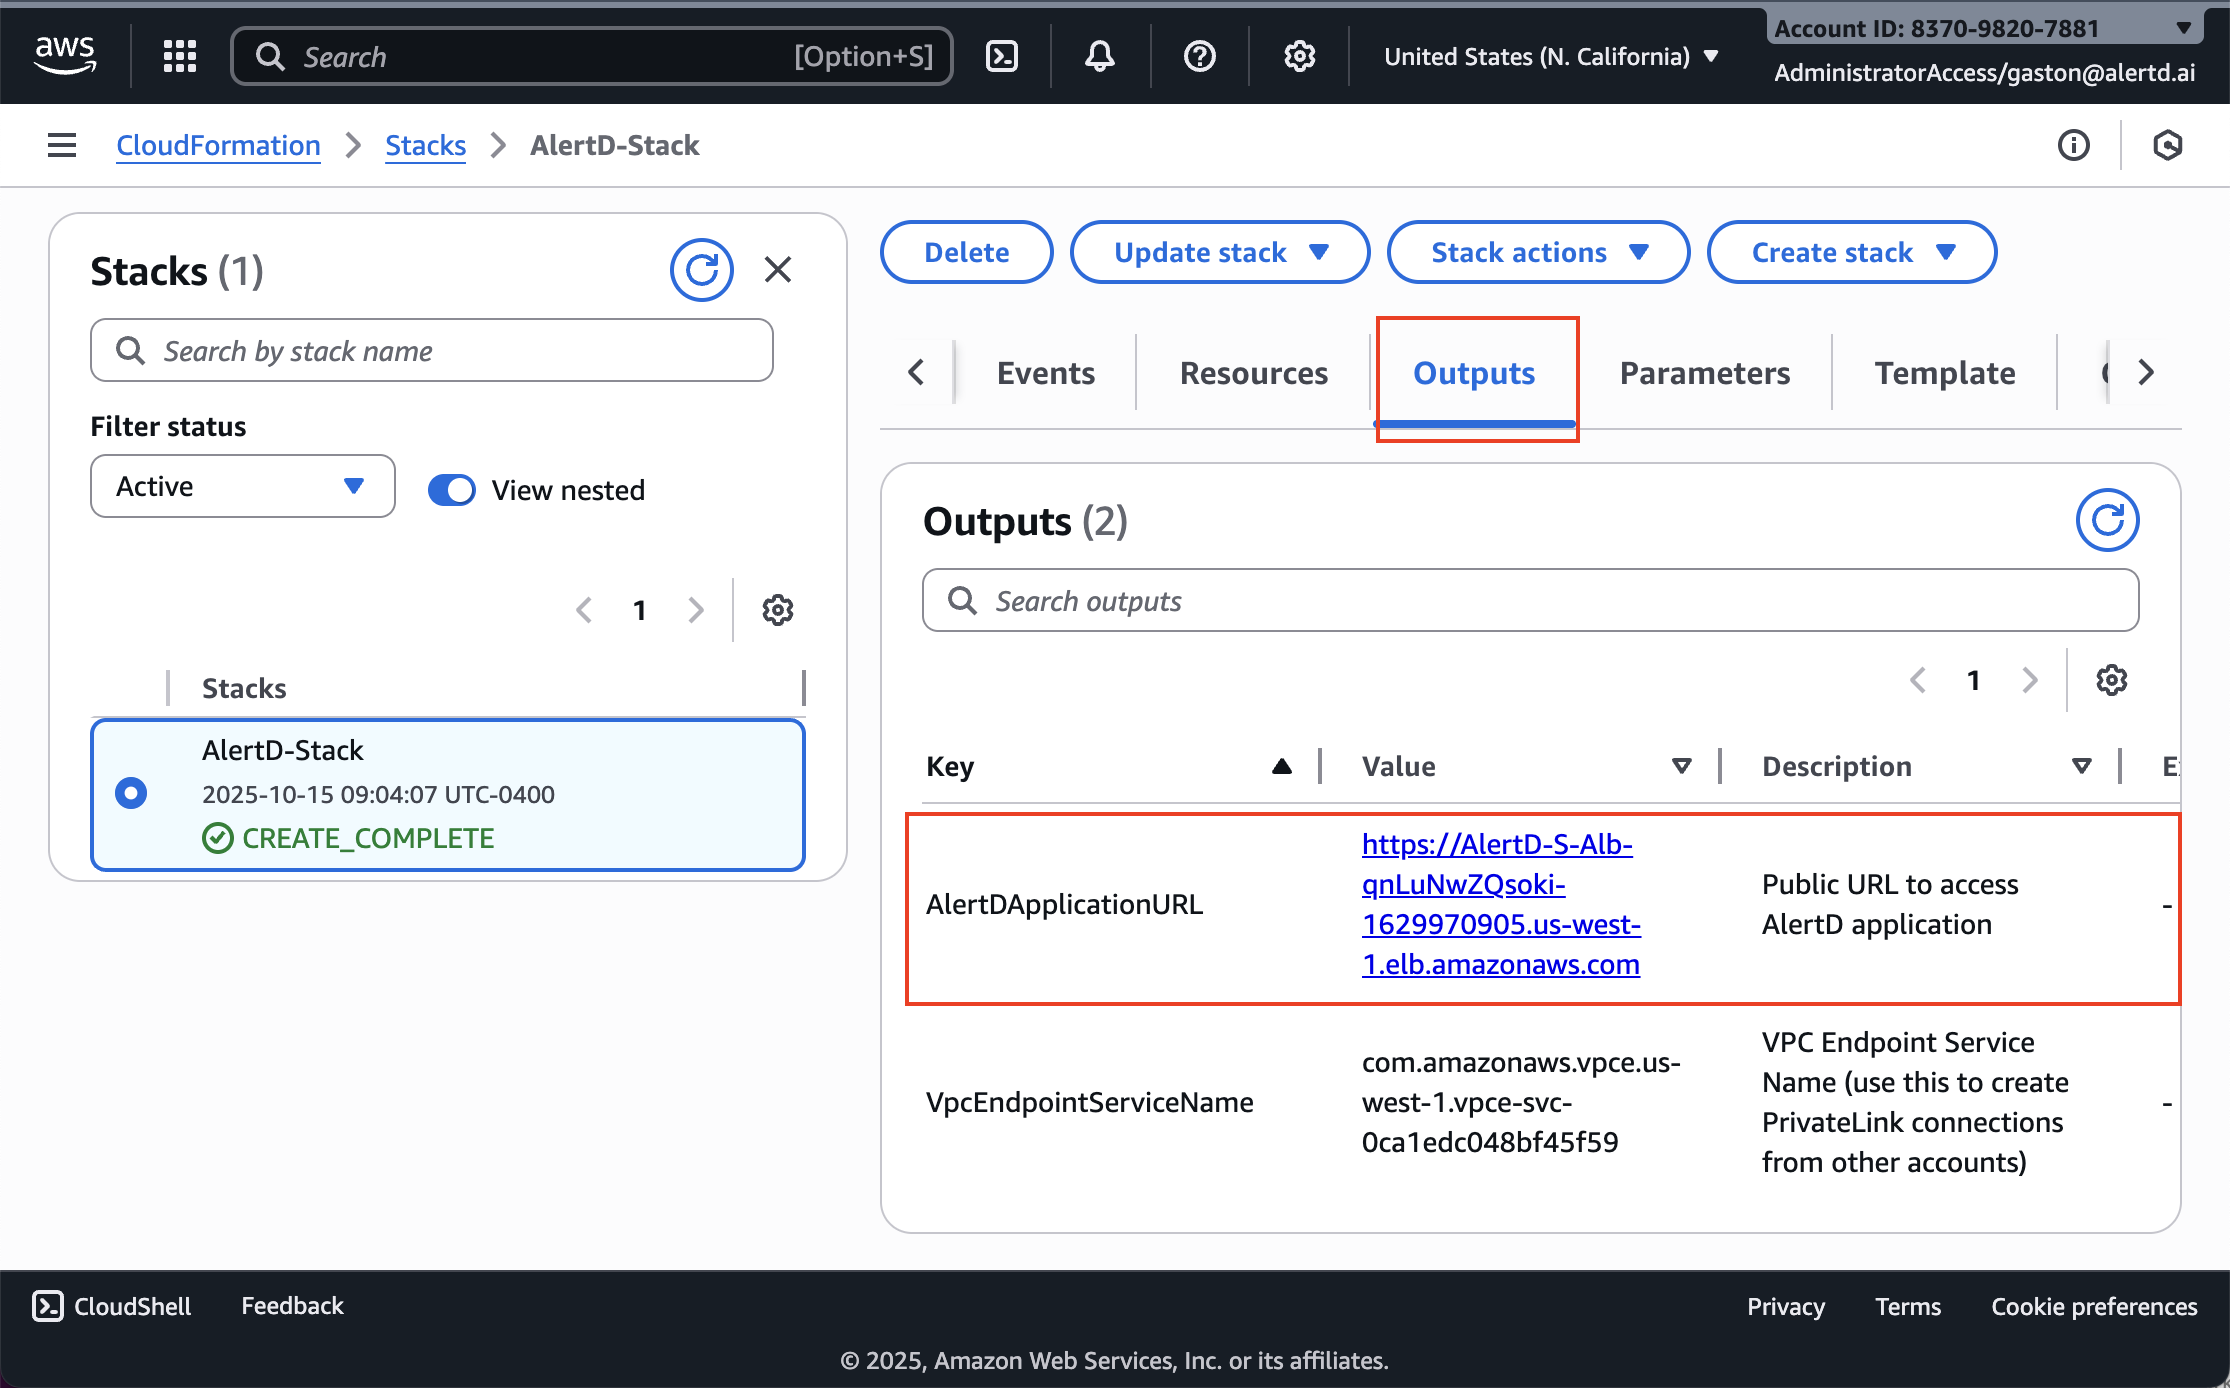
When deployment finishes:
- The stack status updates to CREATE_COMPLETE (green checkmark)
- Click the Outputs tab
- Record the following important values:
Critical Outputs
AlertDApplicationURL
- The public URL for accessing your AlertD web application
- Format:
https://AlertD-S-Alb-xxxx.us-west-1.elb.amazonaws.com - You’ll use this URL to access AlertD and complete setup
VpcEndpointServiceName
- Used for creating PrivateLink connections (if required for private deployments)
- Format:
com.amazonaws.vpce.us-west-1.vpce-svc-xxxx - Share this with AlertD support if needed for design partner access
Save these outputs! You’ll need the AlertDApplicationURL in the next step.
Step 13: Configure DNS (Recommended)
For production use, you should map your custom domain to the AlertD load balancer.
Create a DNS Record
In your DNS provider (e.g., Route53, Cloudflare), create a CNAME record:
Type: CNAME
Name: alertd.example.com
Value: <AlertDApplicationURL from CloudFormation Outputs>
Example:
alertd.example.com → AlertD-S-Alb-abc123.us-west-1.elb.amazonaws.comVerify SSL Certificate
- Ensure your ACM certificate covers the custom domain you’re using
- The certificate should be validated before DNS propagation completes
- DNS changes typically propagate within 5-60 minutes
Step 14: Verify the Deployment
Before handing AlertD to your team, run through this short smoke test to confirm the stack is healthy and the application is serving traffic. The whole check takes 2–3 minutes.
1. Confirm the Stack Status
In CloudFormation → Stacks, the AlertD stack must be in state CREATE_COMPLETE with no failed events on the Events tab.
2. Confirm the ECS Services Are Stable
In ECS → Clusters → <AlertD cluster> → Services, each service should show:
- Running tasks equal to Desired tasks
- Deployment rollout status
COMPLETED - No tasks in Stopped state with recent timestamps
3. Confirm the ALB Target Group Is Healthy
In EC2 → Load Balancers → Target groups, the application target group should show every registered target with Health status = healthy. An unhealthy target indicates the application is not responding to the ALB’s health check.
4. Confirm the Application Started Cleanly
Tail the application log stream and look for the startup banner with no ERROR or stack-trace lines:
aws logs tail /ecs/<stack-name>/app --since 10mIf you see repeated errors or a crash loop, see Monitoring and Maintaining AlertD → Handling Fault Conditions.
5. Open the Application in a Browser
Visit your AlertDApplicationURL (or custom domain) in a browser. You should see the AlertD welcome screen with Continue with Google and Continue with GitHub buttons, served over HTTPS with a valid certificate.
If all five checks pass, the deployment is verified. Proceed to either the Simple Setup or Advanced Setup to complete the application-level configuration.
✅ Deployment Complete!
Your AlertD infrastructure is now running in your AWS environment. The application consists of:
- ECS Fargate Cluster running the AlertD app and Pulsar services
- Aurora Serverless v2 (PostgreSQL-compatible) cluster as the primary data store
- Application Load Balancer routing HTTPS traffic to the application
- Private Service Discovery for internal service communication
- CloudWatch Logs capturing application logs
- Secrets Manager storing database credentials securely
Resources Created
The CloudFormation stack created approximately 30-40 resources including:
- VPC with public/private subnets (if new VPC option selected)
- NAT Gateway and Internet Gateway
- Security groups for each service
- ECS task definitions and services
- Application Load Balancer with listeners and target groups
- CloudWatch log groups
- Service discovery namespace
Next Steps
Now that AlertD is deployed, you need to complete the initial setup. Choose the path that matches your deployment:
-
Same-account monitoring (CreateMonitoringRole =
true, the default): The IAM role was created automatically. Proceed to the simple setup to authenticate and start using AlertD. -
Cross-account monitoring (CreateMonitoringRole =
false): You need to manually create an IAM role in the target account. Proceed to the advanced setup.
Technical Support and SLAs
AlertD includes a single support tier, Business Support, for all customers and design partners at no additional charge. Support is delivered over email at support@alertd.ai — there is no separate help desk portal or ticketing system. Standard support hours are 9:00 AM – 5:00 PM Pacific Time (US), Monday–Friday (excluding public holidays). Critical, production-down requests are handled with priority, including outside standard business hours.
The following SLA targets describe the initial response time for a request, measured from when AlertD receives it:
| Severity | Definition | Coverage | Target Initial Response |
|---|---|---|---|
| Critical | AlertD is down or production monitoring is impaired; no workaround | 24/7, including outside business hours | Within 12 hours |
| High | Major functionality degraded; a workaround may exist | Business hours | Within 1 business day |
| Normal | General questions, configuration help, feature requests | Business hours | Within 2 business days |
To request priority handling for a Critical issue, prefix your email subject with CRITICAL. See Technical Support for the full support and SLA details.
Troubleshooting
Stack Creation Failed
If your stack fails to create:
- Check the Events tab for error messages
- Common issues:
- Invalid certificate ARN or certificate in wrong region
- Insufficient IAM permissions for the deploying user
- VPC subnet configuration errors (if using existing VPC)
- API key issues (if using OpenAI or Anthropic)
Rollback Occurred
If CloudFormation rolled back:
- Review the failure reason in the Events tab
- Delete the failed stack
- Fix the issue (certificate, permissions, etc.)
- Restart deployment from Step 1